
Tested yogurt bread recipe – Little Dollar
Creating a yogurt bread recipe isn’t just about baking; it’s an inviting journey into the world of flavors and comfort. Did you know that by incorporating yogurt, you’re not only adding tanginess but also boosting the bread’s nutritional profile with probiotics? This simple yet versatile bread is perfect for breakfast, lunch, or as a side for your favorite dishes. Whether you’re a seasoned baker or a novice in the kitchen, this yogurt bread recipe is designed to be easy and achievable, transforming your baking endeavors into delightful experiences.
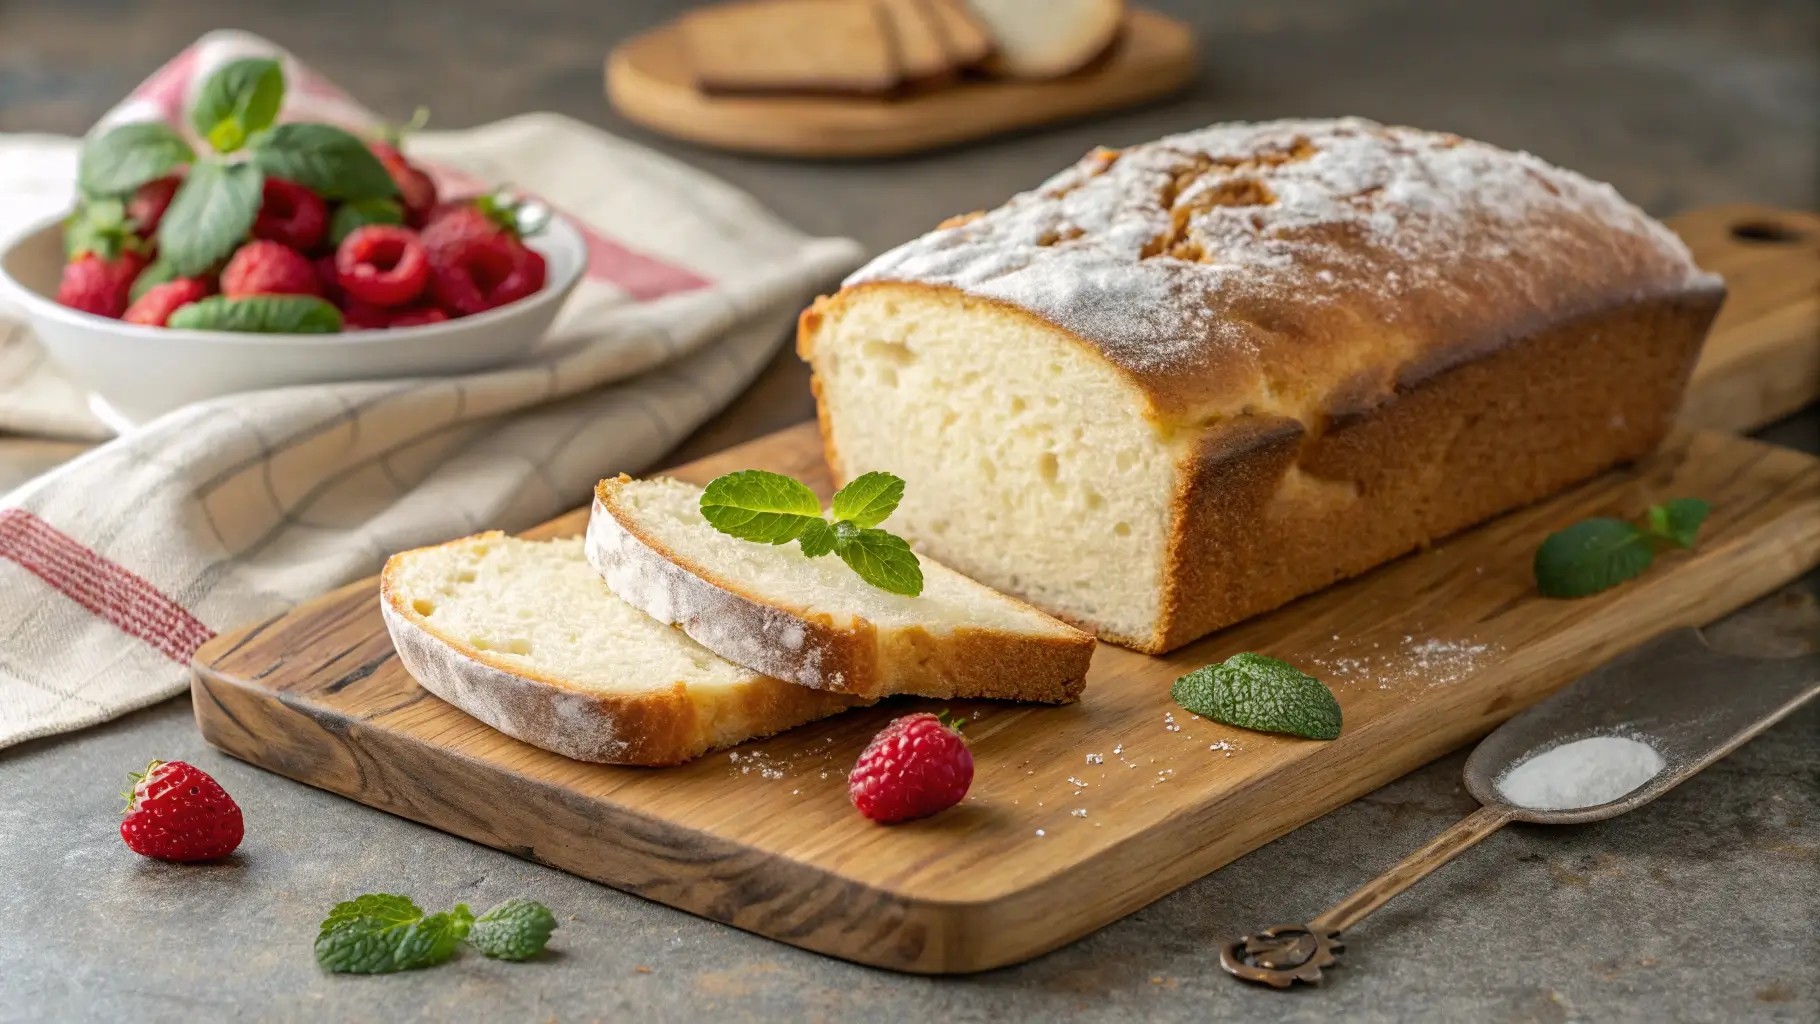
What makes this yogurt bread recipe truly special is its fluffy texture and rich flavor, thanks to yogurt acting as the star ingredient. With minimal preparation time and a few essential ingredients, such as all-purpose flour, baking powder, and olive oil, you’ll have a delectable loaf ready in no time. Plus, the variations you can explore—like adding herbs, spices, or seeds—make this recipe adaptable to any taste or dietary preference.
So, roll up your sleeves, and let’s embark on a delightful culinary adventure! Your family and friends will surely thank you for the delicious slices of homemade yogurt bread that are not only nourishing but irresistibly tasty.
Table of Contents

Benefits of Yogurt Bread
Creating a yogurt bread recipe isn’t just about combining the basic ingredients; it’s about embracing the wonderful benefits that yogurt brings to your baking. If you’re looking for a comforting, delicious option that’s packed with nutrition and flavor, this yogurt bread recipe is an excellent choice. Here are some key benefits that will have you reaching for your mixing bowl in no time!
Nutritional Advantages
One of the most compelling reasons to incorporate yogurt into your bread is the health benefits. Yogurt is a fantastic source of probiotics, which support a healthy gut and improve digestion. Additionally, the protein and calcium found in yogurt contribute not only to the nourishment of this recipe but also enhance overall well-being. So, with every slice of your homemade yogurt bread, you’re treating yourself to something that is both tasty and beneficial.
Flavor and Texture
The addition of yogurt imparts a delightful tanginess to the bread, providing a subtle contrast to its tender, fluffy texture. This unique flavor profile makes yogurt bread incredibly versatile: enjoy it plain, slathered with butter, or paired with your favorite spreads. It’s the kind of bread that complements any meal!
Quick and Easy to Prepare
Who doesn’t love a recipe that’s simple?! One of the standout advantages of this yogurt bread recipe is its quick prep time. With minimal effort and just a handful of ingredients, you can create a delicious homemade loaf in no time. It’s a perfect fit for any skill level—whether you’re a novice baker or a seasoned pro. Baking fresh bread has never been this accessible, making it a fantastic choice for spontaneous baking adventures.
Practical Tips for Success
- Use Room Temperature Yogurt: This helps in fermentation and ensures a lighter loaf.
- Keep an Eye on Rising Time: Warmer environments may require less time, so adjust as needed.
- Don’t Over-Knead: While kneading is crucial for gluten development, overdoing it can lead to dense bread.
So, as you embark on your yogurt bread journey, remember these benefits and tips as they’ll lead you to a truly satisfying baking experience. This yogurt bread recipe isn’t just another meal—it’s an opportunity to create something both delicious and health-conscious right in your kitchen! Enjoy every moment of this delightful culinary adventure!
Ingredients
Creating a delicious yogurt bread recipe starts with the right ingredients. Let’s walk through each component, why it matters, and how you can make substitutions or enhancements to tailor the bread to your liking.

Essential Ingredients
- All-Purpose Flour: This is the backbone of your yogurt bread, providing the structure that holds it all together. For a heartier alternative, consider using whole wheat flour, which will give your bread a nuttier flavor and a boost of fiber.
- Yogurt: The star ingredient! Yogurt not only adds moisture but also infuses the bread with a tangy flavor. While any plain yogurt works, opt for Greek yogurt for a thicker texture and even more protein. If you’re looking for a dairy-free option, coconut yogurt can be a delightful substitute.
- Baking Powder: This leavening agent is crucial for achieving the light and airy texture that makes this yogurt bread so appealing. Make sure it’s fresh; old baking powder can hinder your bread from rising properly.
- Salt: A little salt enhances the flavors of your ingredients, making each bite of your yogurt bread taste balanced and delicious.
- Sugar: Just a hint of sugar helps with browning and adds a subtle sweetness that complements the yogurt without overpowering it.
- Olive Oil or Butter: For richness and flavor, choose one of these. Olive oil promotes a slightly lighter texture, while butter gives a more traditional bread flavor.
- Water or Milk: This is used to adjust the dough’s consistency, helping tie everything together. If you’re using a fattier yogurt, you might need less liquid.
Alternate Ingredients and Options
- Herbs and Spices: Consider adding fresh herbs like rosemary or spices such as garlic powder for unique twists.
- Seeds and Grains: Flaxseeds or oats not only contribute texture but also enhance the bread’s nutritional profile.
These variations empower you to customize the yogurt bread recipe to suit your tastes or dietary needs, making it incredibly versatile.
Remember, the key to a successful yogurt bread lies in the quality of these ingredients. When you choose fresh, high-quality products, you’re setting the stage for a spectacular homemade loaf. So go ahead, start gathering your ingredients, and let’s create something delicious together!
For detailed guidance on ingredient substitutions and measurements, refer to King Arthur Baking’s Substitution Guide.
How to Make Yogurt Bread Recipe
Creating a yogurt bread recipe is a delightful journey that results in a delicious, soft loaf you’ll want to share. Let’s walk through the process step by step, ensuring every detail is covered so that your bread turns out beautifully every time.
Prepare the Dough
- Mix Dry Ingredients: In a large bowl, combine 3 cups of all-purpose flour, 1 tablespoon of baking powder, 1 teaspoon of salt, and 2 tablespoons of sugar. Stir these together to distribute the ingredients evenly.
- Combine Wet Ingredients: In another bowl, mix 1 cup of yogurt (feel free to use Greek yogurt for extra thickness) with 3 tablespoons of olive oil.
- Combine Mixtures: Gradually add the wet ingredients to the dry mix, stirring gently until it starts to come together into a soft dough. If the dough feels too sticky, add a little more flour, one tablespoon at a time.
Knead the Dough
- Flour Your Surface: Lightly flour your work surface and transfer the dough onto it.
- Knead: Using your hands, knead the dough for about 5-7 minutes until it becomes smooth and elastic. This crucial step develops the gluten, which enhances the texture of your yogurt bread.
Let It Rise
- Initial Rise: Place the kneaded dough back in the bowl and cover it with a damp cloth. Allow it to rise in a warm spot for about 30-60 minutes, or until it doubles in size. If your kitchen is cool, you might consider turning on the oven for a moment to warm it slightly, then turning it off and placing the dough inside.
Shape and Bake
- Shape the Dough: Once the dough has risen sufficiently, gently punch it down to release the air. Shape the dough into a loaf or divide it into smaller rolls.
- Preheat Oven: Preheat your oven to 375°F (190°C).
- Prepare for Baking: Place your shaped dough onto a lined baking tray or into a greased loaf pan. If desired, you can brush the top with a bit of olive oil for a gorgeous golden crust.
- Bake: Bake in the preheated oven for 25-30 minutes. You’ll know it’s done when the top is golden brown and the bread sounds hollow when tapped on the bottom.
Tips for Success
- Use yogurt at room temperature to stimulate the fermentation process during rising.
- Adjust rising time based on your kitchen temperature; warmer environments speed up the process.
- If you fancy a crispy crust, place a small pan filled with water on the bottom rack while the bread bakes—this gives it a lovely steam effect.
With these steps, you’re not just making a yogurt bread recipe; you’re crafting a warm, inviting loaf that’ll bring comfort and joy to your table. Enjoy the art of baking!
Pro Tips and Variations
Expert Tips for Perfect Yogurt Bread
- Quality Ingredients Matter: Choosing high-quality yogurt can significantly affect the taste and texture of your yogurt bread. Opt for plain, whole milk yogurt for the best results.
- Allow for Adequate Rising Time: Patience is key! Giving your dough enough time to rise allows for the development of incredible flavor and a lighter texture in your finished bread. If your kitchen is cool, consider placing it in a slightly warm oven (turned off) to help the rising process.
- Play with Flavors: Don’t hesitate to get creative! Add spices such as cinnamon for a warm, inviting aroma or herbs like rosemary for a savory spin. A teaspoon of garlic powder can elevate the bread into an irresistible treat.
Creative Variations
- Savory Yogurt Bread: For a Mediterranean twist, fold in crumbled feta cheese and chopped kalamata olives. This variation pairs beautifully with a bowl of olive oil for dipping.
- Sweet Yogurt Bread: If you’re in the mood for something sweet, try folding in dried fruits like cranberries or apricots, along with a splash of vanilla extract. Serve warmed with a bit of butter for a delightful breakfast treat.
- Cheesy Yogurt Bread: Add shredded cheese (like cheddar or mozzarella) into the dough for a cheesy delight. This variation is perfect for sandwiches or as a side to soups.
- Herbed Yogurt Bread: Incorporate fresh herbs like thyme or parsley into the dough for a fragrant and flavorful bread that complements any meal.
By experimenting with these variations of yogurt bread, you can create a loaf that’s perfectly tailored to your taste buds or suitable for any occasion. These substitutions and options ensure that your adventures in baking with yogurt bread can be as diverse and enjoyable as you’d like. Enjoy the process and happy baking!
Serving Suggestions
When it comes to serving your homemade yogurt bread, the options are as delightful as the bread itself! Whether you’re enjoying a cozy breakfast at home or hosting a dinner party, these creative serving suggestions will elevate your yogurt bread experience.
Perfect Pairings
- With Spreads: A warm slice of yogurt bread is a canvas for creativity! Slather it with creamy butter, smooth cream cheese, or a touch of honey. For a savory twist, try it with herbed butter or a spicy hummus.
- As a Side Dish: Yogurt bread is an excellent companion to comforting soups and vibrant salads. Think of serving it alongside a rich tomato basil soup or a refreshing cucumber salad. The soft, fluffy texture complements the crunch of fresh greens beautifully.
- Crafting Sandwiches: Use your yogurt bread as the foundation for delicious sandwiches. Stack thinly sliced turkey, aged cheddar, and fresh arugula for a quick lunch, or go for classic tuna salad. The tanginess of the yogurt in the bread pairs splendidly with hearty fillings!
- Toast Toppings: Transform slices of yogurt bread into gourmet toast. Top with smashed avocado, sliced tomatoes, or a poached egg for a satisfying brunch option. Add a sprinkle of chili flakes or herbs for a little extra flair.
Presentation Tips
- Rustic Serving: Present your bread in a charming basket lined with a cloth. This creates a cozy, rustic feel that invites people to dig in.
- Garnishing: Fresh herbs like rosemary or thyme scattered on the platter add a pop of color and enhance aroma.
- Accompaniments: Consider serving with pickles, olives, or a fresh salad to add variety and visual allure to your table setting.
Creative Serving Options
- Casual Family-Style: Slice the yogurt bread and place it on a large board with a selection of spreads and toppings. Invite everyone to build their own creations, making it a fun and interactive meal.
- Elegant Settings: For a more formal dinner, elegantly slice the bread and arrange it on a long platter with beautifully folded napkins. Pair it with a fine cheese selection and a glass of white wine to impress your guests.
With these serving suggestions, your yogurt bread will not only satisfy your taste buds but also leave a lasting impression on everyone you serve. Enjoy the process, and let your creativity shine with each loaf you bake!
Common Problems and Solutions When Making Yogurt Bread Recipe
Baking can sometimes feel like a delicate dance, and with yogurt bread recipe, you may encounter a few missteps along the way. Don’t worry; even seasoned bakers face challenges! Here’s a warm and friendly guide to tackle common issues so you can enjoy your delicious yogurt bread without any hitches.
Troubleshooting Common Issues
- Dough is Too Sticky: If you find your dough behaving like a clingy friend, it probably absorbed too much moisture. Simply sprinkle in a bit more flour while kneading until the dough reaches a workable consistency. A little at a time goes a long way here!
- Dense Bread: A loaf that’s denser than a brick can result from over-kneading or not letting the dough rise enough. Keep a close eye on your kneading time — about 5-7 minutes is ideal — and make sure you allow the dough the full 30-60 minutes to rise in a warm spot. Patience is key!
- Bread Doesn’t Rise: If your loaf is looking more like a pancake, check your baking powder for freshness. It should be active and bubbly! Also, ensure the yogurt is at room temperature; this helps the fermentation process so your bread can rise to fluffy perfection.
Problem-Solving Techniques
- If the Bread Isn’t Browning Properly: Oven temperatures can vary, so don’t hesitate to adjust accordingly. If it needs a little boost, raise the temperature by 25°F to help it achieve that beautiful golden brown color.
- Crust Too Hard or Too Soft: For a softer crust, brush the top with melted butter as soon as it comes out of the oven. On the flip side, if it’s too hard, try covering the loaf with a clean kitchen towel while it cools to trap moisture.
This troubleshooting section empowers you to handle any bumps in the road while making your yogurt bread recipe. With these solutions at your fingertips, you’ll be equipped to bake with confidence! Now, let’s get that bread rising and see how delicious your creation can truly be!
Preserving and Reheating Your Yogurt Bread Recipe
Once you’ve baked a delicious loaf of yogurt bread, you’ll want to enjoy it at its best, even days later! Proper storage and reheating are essential to maintain its soft, fluffy texture and delightful tang. Let’s dive into the best ways to keep your yogurt bread fresh and how to warm it up without losing that homemade goodness.
Best Storage Practices
To keep your yogurt bread fresh:
- At Room Temperature: If you plan to enjoy it within a few days, store your yogurt bread in an airtight container at room temperature. It should stay fresh for up to three days, making it a perfect choice for breakfast or snacks!
- Refrigeration: If you need to keep it longer, wrap the loaf tightly in plastic wrap and refrigerate. While this method can extend its shelf life, be aware that refrigeration may alter the bread’s texture slightly, making it a tad denser.
- Freezing for Future Use: Freezing is your best bet for long-term storage. Slice your yogurt bread and wrap each piece tightly with plastic wrap before placing it in a freezer-safe bag. This way, you can take out just what you need! Frozen yogurt bread can last up to three months without losing much flavor or texture.
Food Safety Tips
To prevent spoilage and potential bacterial growth, always ensure your bread is completely cooled before wrapping and storing. If you notice any signs of mold or an off smell, it’s best to discard it—safety first!
Reheating Tips
When you’re ready to enjoy a slice (or two!) of your yogurt bread, reheating it properly will rekindle that fresh-baked charm. Here are a few methods to consider:
- Oven Method: Preheat your oven to 350°F (175°C). Wrap the entire loaf or individual slices in aluminum foil to retain moisture. Heat for about 10-15 minutes until warmed through. This method works wonders for restoring the bread’s original texture!
- Microwave Method: In a pinch? Place a slice of yogurt bread on a microwave-safe plate and cover it with a damp paper towel to add moisture. Microwave for 15-20 seconds, checking to ensure it doesn’t get rubbery. Adding that moisture will help keep it tender!
- Air Fryer Method: For a quick reheat that adds a bit of crispness, preheat your air fryer to 300°F (150°C). Place the slice in the basket and air fry for about 3-5 minutes. Keep an eye on it to prevent overcooking and enjoy a delightfully warm piece!
- Stovetop Method: Heat a non-stick skillet over medium heat and place your slice of yogurt bread in the pan. Cover with a lid to trap in heat and moisture, warming it for about 2-3 minutes on each side. This method gives a lovely toasted finish.
By following these storage tips and reheating methods, you can savor your yogurt bread recipe days after it’s been baked, with all the texture and flavor intact. Whether you’re enjoying it fresh from the oven or warming up leftovers, this yogurt bread will always be a comforting treat!
Conclusion
As we wrap up this delightful journey into homemade yogurt bread, it’s clear that this tested yogurt bread recipe is a wonderful way to bring both flavor and nourishment to your table. With just a few simple steps—mixing easy ingredients, kneading once, and allowing the dough to rise—you’ll create a loaf that’s soft, tangy, and utterly satisfying. The versatility of this recipe means you can customize it to fit your palate, whether you choose to infuse it with herbs or sweeten it with fruits.
I wholeheartedly encourage you to roll up your sleeves and dive into this baking adventure! Your creation is not just about the end result but the joy and creativity you unleash in the kitchen. Don’t hesitate to share your results or ask any questions along the way; I’m here to support you. Moreover, feel free to experiment with variations—perhaps a garlic-infused loaf or a zesty whole wheat version—because cooking is meant to be fun and imaginative!
Remember, every slice of homemade yogurt bread is a step towards mastering your baking craft. So embrace the process and savor the warm, comforting aromas that fill your kitchen. Happy baking!
Hungry for more delicious creations? Browse our site for (more recipes) and endless inspiration to spark your next culinary adventure!
Yogurt Bread Recipe
Ingredients
Dry Ingredients:
- 3 cups all-purpose flour or whole wheat flour for a heartier version
- 1 tablespoon baking powder
- 1 teaspoon salt
- 2 tablespoons sugar
Wet Ingredients:
- 1 cup plain yogurt Greek yogurt for a thicker texture
- 3 tablespoons olive oil or melted butter
- ¼ cup water or milk adjust as needed
Optional Add-Ins:
- 1 teaspoon garlic powder or cinnamon for extra flavor
- ¼ cup shredded cheese cheddar or mozzarella
- 2 tablespoons chopped herbs rosemary, thyme, or parsley
- ¼ cup dried fruits cranberries, raisins, or apricots
Instructions
1️⃣ Prepare the Dough
- In a large bowl, whisk together flour, baking powder, salt, and sugar.
- In another bowl, mix yogurt, olive oil, and water/milk until smooth.
- Gradually add the wet ingredients to the dry, stirring until a soft dough forms.
- If the dough is too sticky, add more flour, one tablespoon at a time.
2️⃣ Knead the Dough
- Lightly flour a clean surface and transfer the dough onto it.
- Knead for 5-7 minutes until it becomes smooth and elastic.
3️⃣ Let It Rise
- Place the dough in a greased bowl, cover with a damp cloth, and let it rise in a warm spot for 30-60 minutes, or until it doubles in size.
4️⃣ Shape & Preheat Oven
- Preheat oven to 375°F (190°C).
- Gently punch down the dough to release air, then shape it into a loaf or rolls.
- Place on a lined baking sheet or in a greased loaf pan.
- (Optional) Brush the top with olive oil or butter for a golden crust.
5️⃣ Bake to Perfection
- Bake for 25-30 minutes, until golden brown and sounds hollow when tapped.
- Let it cool for 10 minutes before slicing.
Notes
✅ Use yogurt at room temperature – this helps with fermentation and rising.
✅ Let the dough rise fully – if your kitchen is cool, place it in a slightly warm oven (turned off).
✅ Want a crispy crust? Place a small pan of water on the bottom rack while baking for steam. 🍽️ Serving Suggestions
Perfect Pairings:
With spreads: Butter, honey, cream cheese, or hummus.
As a side: Pair with soups or fresh salads.
For sandwiches: Use for turkey, cheese, or tuna sandwiches.
As toast: Top with avocado, poached eggs, or nut butter.
Presentation Ideas:
Serve in a rustic breadbasket for a cozy feel.
Garnish with fresh herbs for an elegant touch.
🥄 Variations to Try
🌿 Savory Version: Add feta, olives, and oregano for a Mediterranean-style bread.
🍫 Sweet Version: Mix in cinnamon, vanilla, and dried fruits for a delightful breakfast treat.
🧀 Cheesy Bread: Fold in shredded cheddar or mozzarella for a gooey, delicious bite.
FAQs
Can I use coconut yogurt instead of regular yogurt?
Absolutely! Coconut yogurt works well in this yogurt bread recipe, making it dairy-free and suitable for vegan diets. Just keep in mind that the flavor will shift slightly, introducing a delightful tropical twist to the bread.
How do I know when my bread is fully baked?
To check if your yogurt bread is fully baked, gently tap the bottom of the loaf. If it sounds hollow, it’s done! Additionally, look for a golden-brown crust on top to ensure a perfect bake.
Can I modify the recipe for gluten-free options?
Yes, you can definitely modify the yogurt bread recipe for gluten-free diets! Simply swap in a gluten-free flour blend, and you might need to tweak the liquid amounts slightly to achieve the best texture.
How can I add more flavor to my yogurt bread?
Getting creative with flavors is one of the joys of baking! Consider folding in fresh herbs, spices, nuts, or dried fruits into the dough to enhance the flavor profile. Experimenting with different combinations can lead to delicious surprises!
How can I add more flavor to my yogurt bread?
Getting creative with flavors is one of the joys of baking! Consider folding in fresh herbs, spices, nuts, or dried fruits into the dough to enhance the flavor profile. Experimenting with different combinations can lead to delicious surprises!
Can I make yogurt bread in a bread machine?
Absolutely! If you have a bread machine, simply follow your machine’s specific instructions for the appropriate settings while incorporating this yogurt bread recipe. It’s a great way to simplify the process and still enjoy homemade bread.