Bargain pear bread recipe – Want Feast
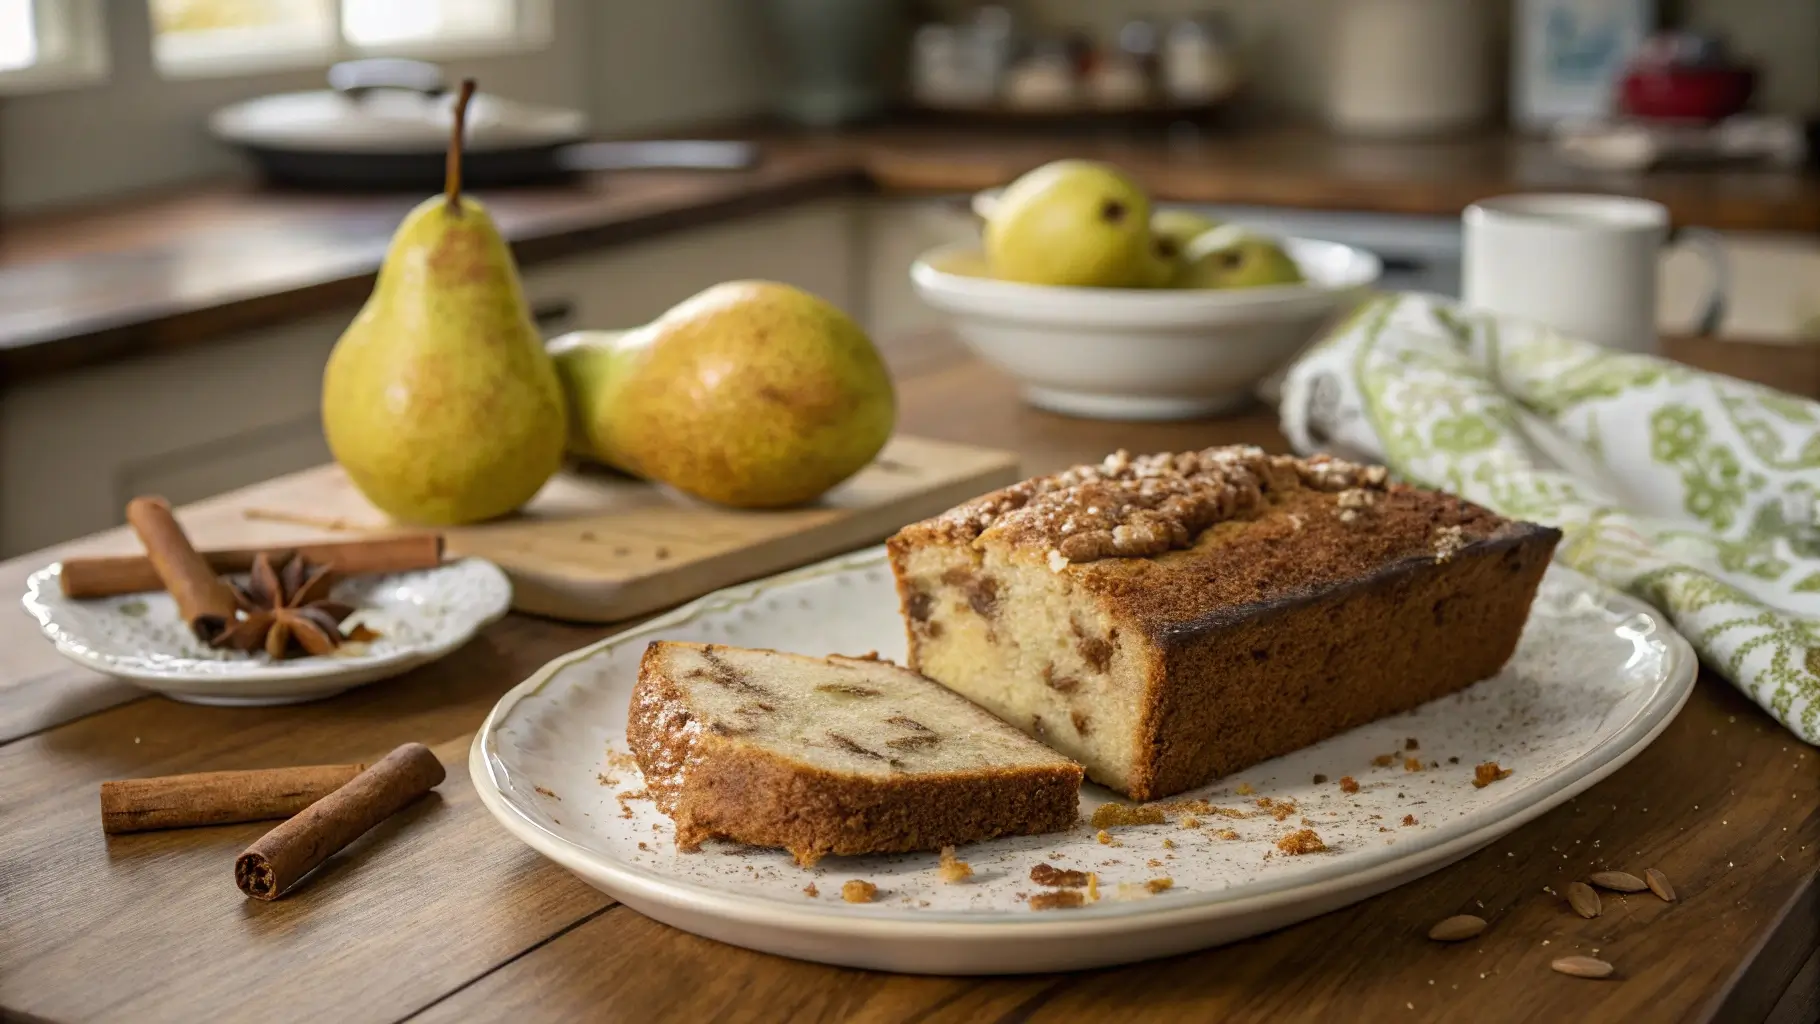
Are you ready to indulge in a warm, delightful slice of homemade pear bread? The pear bread recipe is not just a simple baked good; it’s a celebration of flavor, nutrition, and creativity in the kitchen. Imagine the aroma of ripe pears mingling with warm spices, creating an irresistible allure that fills your home. This recipe invites you to explore the unique balance of sweet, tender pears and the comforting texture of fresh-baked bread, making it the perfect option for breakfast, a midday snack, or even dessert.
What makes this pear bread recipe truly special is not just its deliciousness but also its health benefits. Packed with dietary fiber and essential vitamins, it bridges the gap between indulgence and nutrition. Plus, it’s incredibly versatile—add nuts, spices, or even a drizzling of glaze to tailor it to your taste. And don’t worry about your budget; this bargain-friendly recipe uses affordable ingredients that you likely already have in your pantry.
So, gather your ingredients and prepare to embark on a delightful baking adventure. Let this pear bread recipe become a cherished addition to your culinary repertoire, bringing warmth and joy to every gathering or cozy evening at home!
Table of Contents
Part 1: Key Benefits
1.1 Nutritional Advantages of Pear Bread
When it comes to health benefits, the pear bread recipe truly shines. Packed with dietary fiber, pears promote digestive health, helping keep things moving along nicely. Their natural sweetness not only satisfies your cravings but also allows you to cut back on added sugars, making this treat as guilt-free as it is delicious! Plus, pears are rich in vitamins C and K, offering a boost to your immune system and supporting bone health. So, enjoying a slice of pear bread isn’t just indulgent—it’s a small nod to your nutritional goals.
| Nutrient | Per Serving |
|---|---|
| Calories | 220 |
| Total Fat | 9g |
| Protein | 3g |
| Total Carbohydrates | 33g |
| Dietary Fiber | 2g |
| Sugars | 12g |
1.2 Versatility and Adaptability
The beauty of the pear bread recipe lies in its versatility. This delightful bread can be enjoyed at any time of day: start your morning with a slice alongside your coffee, pack it as a wholesome afternoon snack, or serve it as a delightful dessert after dinner. The base recipe can be easily customized with additional ingredients like nuts for crunch, or spices for a flavor kick, ensuring that it aligns perfectly with your taste buds and dietary preferences. The possibilities are endless!
1.3 Budget-Friendly Baking
Who says delicious treats have to be expensive? The pear bread recipe is incredibly budget-friendly, utilizing cost-effective ingredients that won’t break the bank. You can create a bakery-quality loaf right from your kitchen, indulging in rich flavors without financial stress. This recipe helps you satisfy your cravings for sweet bread while making economical choices—proof that delicious baking can be both affordable and rewarding.
Part 2: Ingredients
2.1 Fresh, Quality Ingredients
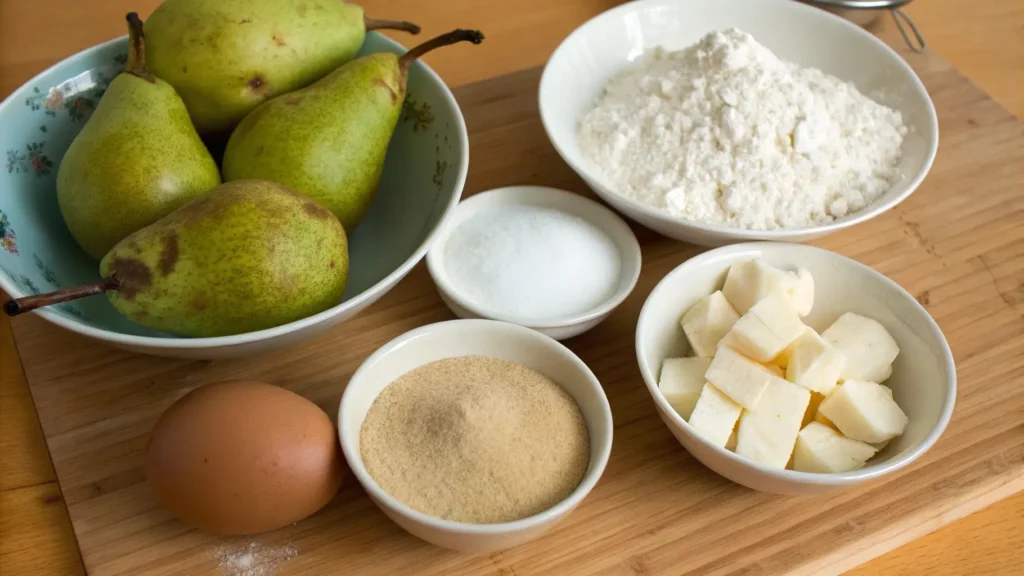
To bring your pear bread recipe to life, it all starts with the right ingredients. Here’s what you’ll need:
- Pears: 2-3 medium ripe pears, peeled and diced. Look for pears that yield slightly to pressure but aren’t too soft. Varieties like Bartlett or Bosc work beautifully for their sweetness and flavor.
- Flour: 2 cups of all-purpose flour or whole wheat flour if you’re leaning toward a healthier spin.
- Sugar: ¾ cup of brown sugar gives the bread a rich, caramel flavor that complements the pears perfectly.
- Eggs: 2 large eggs, lightly beaten, help bind the ingredients and add moisture.
- Baking Powder: 1 teaspoon for a fluffy rise.
- Baking Soda: ½ teaspoon will enhance the texture and create that lovely crumb.
- Salt: ½ teaspoon to amplify the flavors.
- Cinnamon: 1 teaspoon brings warmth and wonderful spice notes to your bread.
- Oil: ½ cup of vegetable or olive oil keeps your bread moist and delicious.
2.2 Optional Additions for Flavor
Want to take your pear bread recipe to the next level? Consider these optional ingredients:
- Nuts: ½ cup of chopped walnuts or pecans not only add crunch but a delightful nuttiness.
- Raisins or Dried Cranberries: ½ cup can introduce extra sweetness and chewiness.
- Vanilla Extract: 1 teaspoon enhances the overall flavor, making each bite even more satisfying.
When selecting your ingredients, remember that freshness counts—ripe pears and good-quality flour will make your pear bread recipe truly shine! Plus, be creative with your substitutions. If pears are in short supply, feel free to experiment with apples or even seasonal fruits. Enjoy the process of baking this delicious treat, and let each ingredient inspire you!
Part 3: How to Make Pear Bread Recipe
Crafting the perfect pear bread is a rewarding process, and I’m here to guide you step-by-step. This pear bread recipe is straightforward, allowing you to enjoy the delightful aroma of baking while nourishing your body. Let’s dive in!
3.1 Preparation Steps
- Preheat the Oven: Begin by preheating your oven to 350°F (175°C). A well-heated oven is crucial for an even bake.
- Mix Dry Ingredients: In a large bowl, whisk together 2 cups of all-purpose flour, 1 teaspoon of baking powder, ½ teaspoon of baking soda, ½ teaspoon of salt, and 1 teaspoon of cinnamon. This step ensures your leavening agents are evenly distributed.
- Prepare the Pears: While those dry ingredients are coming together, take 2-3 medium ripe pears, peel and dice them into bite-sized pieces. The riper the pears, the sweeter your bread will be!
- Combine Wet Ingredients: In a separate bowl, mix ¾ cup of brown sugar, 2 large beaten eggs, and ½ cup of vegetable oil. Whisk until everything is well blended. This mixture provides moisture and a sugar base.
- Combine Mixtures: Gradually add the dry ingredients to the wet mixture. Stir gently until just combined. Remember, overmixing can make your pear bread tough, so be gentle!
- Fold in Pears: Carefully fold your diced pears and any optional additions—like ½ cup of chopped nuts or dried fruits—into the batter. Be sure to distribute them evenly.
3.2 Baking Process
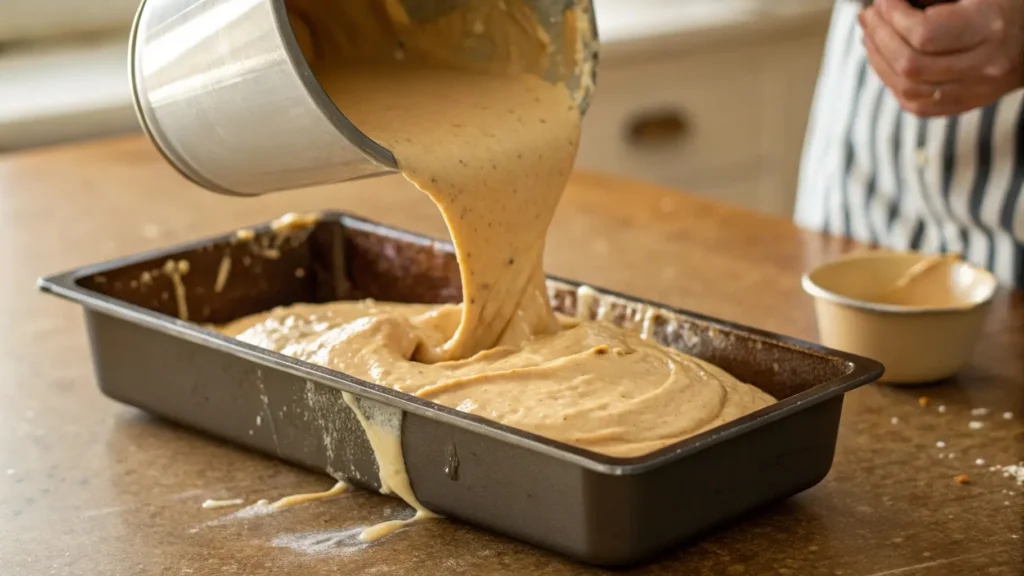
- Grease the Pan: Lightly grease a 9×5 inch loaf pan with oil or cooking spray to prevent sticking.
- Pour in the Batter: Pour your beautifully mixed batter into the prepared loaf pan. Use a spatula to smooth the top, ensuring it’s even across.
- Bake: Place your loaf in the preheated oven and bake for 55-65 minutes. To check for doneness, insert a toothpick into the center; it should come out clean. The scent alone will be heavenly!
3.3 Cooling and Storing
- Cool Thoroughly: After baking, allow the bread to cool in the pan for 10 minutes. Then, transfer it to a wire rack to cool completely. This cooling process helps set the bread’s texture.
- Store Properly: Once cooled, wrap your pear bread tightly in plastic wrap or aluminum foil to maintain its freshness. It can also be stored in an airtight container at room temperature.
By following these simple steps in this pear bread recipe, you will create a delightful loaf that is sure to impress. Remember, patience is key, and enjoying the process can make all the difference in your baking adventure. Happy baking!
Part 4: Pro Tips and Variations
4.1 Expert Tips for Perfecting Your Pear Bread Recipe
- Use Ripe Pears: The best pear bread comes from using pears that are ripe but still firm. Overripe pears can make your bread too mushy, so aim for that perfect balance, where they are soft enough to be sweet but not falling apart.
- Don’t Overmix: Remember, when combining your wet and dry ingredients, keep mixing to a minimum. Overmixing can lead to tough bread instead of the soft, fluffy texture we’re after. Just stir until everything is combined—it’s okay if there are a few lumps!
- Add Texture: If you’re a fan of a bit of crunch, consider lightly toasting your nuts before folding them into the batter. This brings out their flavor even more, enhancing the overall taste of your pear bread.
4.2 Exciting Variations
- Spiced Pear Bread: Feeling adventurous? Try adding ½ teaspoon of nutmeg or ginger for a unique twist that dances on your palate. The combination of spices will elevate the warm flavors of the bread.
- Glazed Pear Bread: For an extra touch of sweetness, drizzle a simple glaze made from powdered sugar and milk over the top once your bread has cooled. It makes for a lovely presentation and a delightful bite!
- Vegan Adaptation: If you’re looking for a vegan-friendly option, swap out the eggs for ¼ cup of unsweetened applesauce or mix 1 tablespoon of flaxseed meal with 2.5 tablespoons of water as an egg replacement. This keeps the bread moist while adhering to vegan diets.
- Gluten-Free Option: You can also make this pear bread gluten-free by substituting all-purpose flour with a 1:1 gluten-free baking mix. Just be sure to still include the other ingredients as they are for a beautiful, soft loaf.
These pro tips and variations will ensure your pear bread recipe shines in flavor, texture, and creativity. Whether you’re baking for breakfast, a snack, or dessert, you have the flexibility to adapt the recipe to suit your tastes and dietary needs. So gather your ingredients, roll up your sleeves, and bake something magical with this pear bread recipe!
Part 5: Serving Suggestions
When it comes to bringing your delicious pear bread recipe to the table, presentation and pairings can truly elevate the experience. Here are some delightful ways to serve your freshly baked pear bread that will leave everyone impressed!
5.1 Plating Ideas
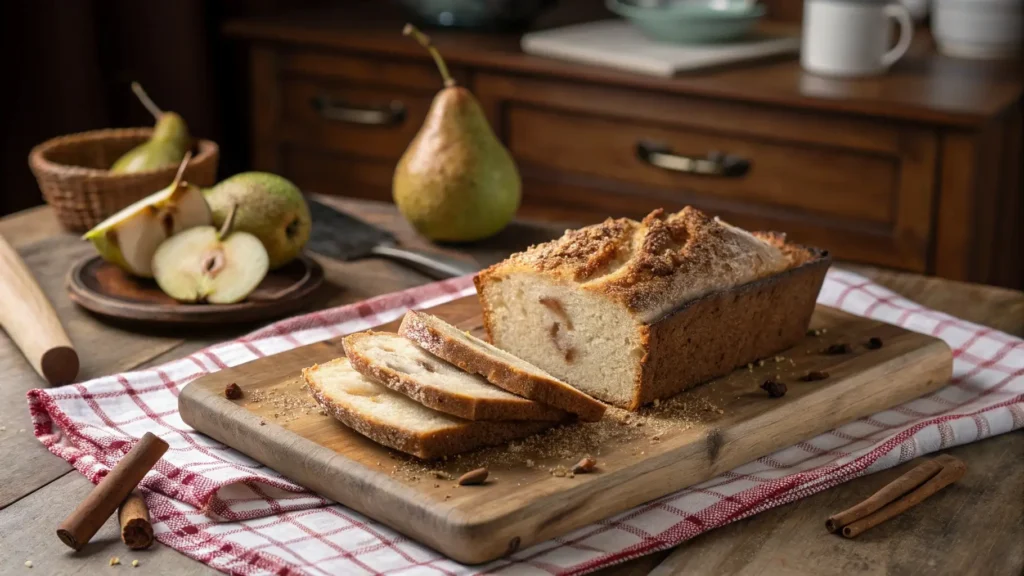
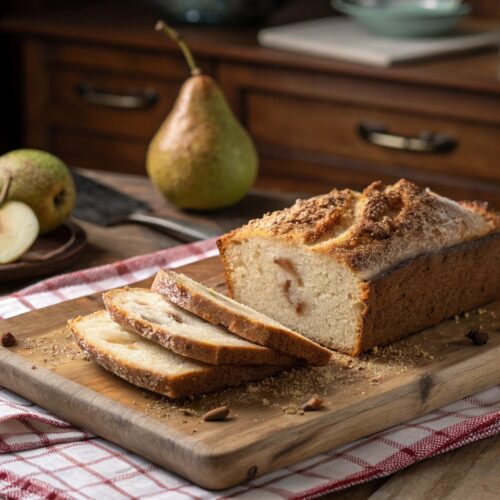
- Rustic Charm: Serve sliced pear bread on a wooden board, accompanied by a small bowl of honey or maple syrup for drizzling. Garnish with fresh pear slices and a sprinkle of cinnamon for a stunning visual.
- Elegant Ensemble: Arrange slices on a white cake stand, dust with powdered sugar, and top with a few toasted walnuts. This simple addition adds both texture and a touch of sophistication.
- Family-Style Festivity: Place the loaf on a large platter with a butter dish and spreadable options like cream cheese or mascarpone. This invites guests to help themselves and creates a warm, communal dining experience.
5.2 Side Dish Pairings
- Breakfast Boost: Pair your pear bread slices with a side of Greek yogurt topped with berries and a drizzle of honey. The creamy yogurt contrasts wonderfully with the moist bread, making it a balanced breakfast option.
- Dessert Delight: Melt your guests’ hearts by serving warm slices of pear bread with a scoop of vanilla ice cream or a dollop of whipped cream. This indulgent treat feels like a luxurious dessert!
- Snack Attack: Cut pear bread into small cubes and serve with a cheese platter. Think creamy Brie or sharp cheddar for a delightful flavor contrast.
5.3 Perfect Beverage Matches
To round out your serving suggestions, consider these drink pairings:
- Coffee Companion: A hot cup of freshly brewed coffee enhances the bread’s warm flavors, creating a cozy atmosphere.
- Tea Time Treat: Enjoy your pear bread with a calming herbal tea, such as chamomile or peppermint, for a soothing afternoon snack.
With these charming serving suggestions, your pear bread recipe will not only taste incredible but will also look as inviting as it is to eat. Enjoy sharing these moments with family and friends!
Part 6: Common Problems and Solutions When Making Pear Bread Recipe
Baking is both an art and a science, and even the simplest recipes can present a few bumps along the way. But fear not! Here’s a friendly guide to address the common issues you might encounter while making your pear bread recipe, ensuring that your baking experience is smooth and the results are delicious.
6.1 Problem: Bread Not Rising
If your pear bread doesn’t rise adequately, the first thing to check is the freshness of your baking powder and baking soda. These leavening agents are crucial for lift. A simple way to test them is to mix a teaspoon of baking powder with hot water; if it bubbles vigorously, you’re in business! For baking soda, add a bit of vinegar or lemon juice; a fizz means it’s still good to use.
6.2 Problem: Overly Moist Bread
Have you ever cut into your pear bread only to find it’s too moist? Don’t worry; it happens to the best of us! To remedy this, be sure to measure your flour correctly—too much liquid can lead to a soggy center. Additionally, letting the mixture rest for a few minutes before baking allows the flour to absorb some of the moisture, helping to create that perfect texture.
6.3 Problem: Uneven Baking
If your bread appears unevenly baked, here’s a quick fix: rotate it halfway through the baking process. Ovens can have hot spots, and turning your loaf ensures that every part receives even heat and bakes to perfection.
6.4 Problem: Crust Too Hard
A hardened crust can be a sign that your bread has spent a bit too much time in the oven. To prevent this, keep an eye on your treat during the last 10 minutes of baking. When the top turns a lovely golden brown, it’s time to take it out. Remember, the toothpick test is your best friend here; it should come out clean for a perfectly done loaf.
Baking should be a joyful experience, and troubleshooting these common issues will enhance your skills with every pear bread recipe you whip up. With these handy tips in your back pocket, you’re well on your way to mastering this delightful dish! Happy baking!
Preserving and Reheating Your Pear Bread Recipe
Storing your delightful pear bread recipe is just as important as crafting it, as it ensures every slice remains moist, flavorful, and ready to be enjoyed. Here’s how to keep your pear bread fresh and how to reheat it like a pro.
Proper Preservation Techniques
To maintain the quality of your pear bread:
- Wrap it Right: Once your pear bread has cooled completely, wrap it tightly in plastic wrap, or place it in an airtight container. This prevents air from drying it out and keeps it deliciously moist.
- Refrigeration: If you plan to enjoy your pear bread within a week, storing it in the refrigerator is a great option. Under these conditions, it can stay fresh for up to 5-7 days.
- Freezing Option: For long-term enjoyment, freeze your pear bread! Slice it into manageable portions, wrap each slice in plastic wrap, and then place them in a freezer-safe bag. When stored this way, your pear bread can last up to 3 months without losing flavor.
Food Safety Tips
To prevent spoilage or bacterial growth:
- Always cool the bread completely before wrapping.
- If you see any sign of mold or an off smell, it’s better to err on the side of caution and discard it.
Reheating Methods
When you’re ready to savor that sweet, spiced goodness again, here are some effective reheating methods to preserve its delightful taste and texture:
- Microwave Method: For a quick fix, pop an individual slice of pear bread in the microwave. Heat it on medium power for about 15-20 seconds. Make sure to keep an eye on it to avoid drying out.
- Oven Method: To refresh the crust and flavor, preheat your oven to 350°F (175°C). Place the bread directly on the oven rack or on a baking sheet and heat for about 10 minutes. This method helps to bring back that freshly baked aroma and ensures the texture remains fluffy inside while the crust revitalizes.
- Stovetop Method: For a unique experience, you can heat a slice on a skillet over low heat. Adding a tiny bit of butter can enhance the flavor as it warms, turning your pear bread into a delightful treat reminiscent of buttery French toast.
By following these storage and reheating tips, your pear bread recipe will remain a memorable delight every time you enjoy it. Whether it’s for breakfast, a snack, or dessert, each warming slice will invite you back to that cozy baking session. So go ahead, treat yourself to a delicious slice of that bargain pear bread recipe—you deserve it!
As you wrap up your cooking adventure with this delightful pear bread recipe
Take a moment to reflect on the wonderful process you’ve just undertaken. From selecting ripe, juicy pears to gently folding them into a light, fluffy batter, every step showcases the simplicity and charm of homemade baking. This recipe not only allows you to create a delicious treat but also encourages you to tap into your culinary creativity. Remember, you can customize it with your favorite nuts or spices, making each loaf uniquely yours.
Now, I invite you to slice into your freshly baked pear bread and savor the sweet, aromatic flavors that fill your kitchen. Don’t hesitate to share your results or ask any questions you may have—we’re all in this baking journey together! Explore different variations, perhaps with a hint of orange zest or a drizzle of glaze, to find your perfect match.
Cooking is truly an enjoyable experience, and this pear bread recipe is a fantastic way to get creative and have fun in the kitchen. So go ahead, gather your ingredients, and dive into the joy of baking—your taste buds will thank you! Happy baking!
Hungry for more delicious creations? Browse our site for (more recipes) and endless inspiration to spark your next culinary adventure!
Pear Bread Recipe
Ingredients
Main Ingredients:
- 2-3 medium ripe pears peeled and diced
- 2 cups all-purpose flour or whole wheat flour for a healthier option
- ¾ cup brown sugar
- 2 large eggs lightly beaten
- ½ cup vegetable or olive oil
- 1 teaspoon baking powder
- ½ teaspoon baking soda
- ½ teaspoon salt
- 1 teaspoon ground cinnamon
Optional Add-ins for Extra Flavor:
- ½ cup chopped walnuts or pecans
- ½ cup raisins or dried cranberries
- 1 teaspoon vanilla extract
Instructions
Preparation Steps
Step 1: Preheat the Oven
- Preheat your oven to 350°F (175°C). Grease a 9×5-inch loaf pan with oil or cooking spray.
Step 2: Mix Dry Ingredients
- In a large bowl, whisk together:
- ✅ 2 cups flour
- ✅ 1 tsp baking powder
- ✅ ½ tsp baking soda
- ✅ ½ tsp salt
- ✅ 1 tsp cinnamon
- This ensures an even distribution of the dry ingredients.
Step 3: Prepare the Pears
- Peel and dice 2-3 medium pears into bite-sized pieces. The sweeter the pears, the better the flavor!
Step 4: Combine Wet Ingredients
- In another bowl, whisk together:
- ✅ ¾ cup brown sugar
- ✅ 2 beaten eggs
- ✅ ½ cup vegetable oil
- This mixture provides moisture and sweetness.
Step 5: Combine Wet and Dry Mixtures
- Gradually add the dry ingredients into the wet mixture. Stir gently until just combined—overmixing can make the bread tough.
Step 6: Fold in Pears and Optional Additions
- Carefully fold the diced pears and any optional add-ins (nuts, raisins, or vanilla extract) into the batter.
- Baking Process
Step 7: Pour into Loaf Pan
- Pour the batter into your greased 9×5-inch loaf pan and smooth the top with a spatula.
Step 8: Bake the Pear Bread
- Place the loaf in the preheated oven and bake for 55-65 minutes. To check for doneness, insert a toothpick into the center—it should come out clean.
- Cooling and Storing
Step 9: Cool the Bread
- Let the bread cool in the pan for 10 minutes, then transfer it to a wire rack to cool completely.
- Step 10: Store for Freshness
- Wrap the cooled bread in plastic wrap or an airtight container to keep it fresh for up to 3 days at room temperature or 1 week in the refrigerator.
Video
Notes
✔️ Use ripe but firm pears—they add natural sweetness without making the bread too mushy.
✔️ Don’t overmix the batter; stir until just combined to keep the bread soft.
✔️ Toast nuts before adding them to bring out their flavor.
✔️ Rotate the pan halfway through baking for even cooking. Exciting Variations
🌟 Spiced Pear Bread: Add ½ teaspoon of nutmeg or ginger for extra warmth.
🌟 Glazed Pear Bread: Drizzle a glaze made of powdered sugar + milk on top after baking.
🌟 Vegan Version: Replace eggs with ¼ cup applesauce or a flax egg (1 tbsp flaxseed + 2.5 tbsp water).
🌟 Gluten-Free Option: Swap all-purpose flour with a 1:1 gluten-free baking mix. Serving Suggestions
🍯 Rustic Charm: Serve with honey or maple syrup on a wooden board.
🧀 Snack Pairing: Pair with cream cheese, mascarpone, or a cheese platter.
☕ Beverage Match: Enjoy with coffee, herbal tea, or warm spiced cider.
FAQs
1. Can I use other fruits in this recipe?
Absolutely! You can easily substitute pears with other fruits like apples, peaches, or even mixed berries. This flexibility allows you to customize your pear bread recipe based on what you have on hand or your personal preferences.
2. How long can I store pear bread?
When stored properly, your homemade pear bread can last for about 3-4 days at room temperature. Just keep it wrapped tightly in plastic wrap or in an airtight container. If you want to keep it for longer, consider freezing it; it can last up to three months in the freezer.
3. Can I make this recipe vegan?
Yes, you can adapt the pear bread recipe to be vegan! Substitute the eggs with either mashed bananas (about 1/4 cup for each egg) or a flaxseed meal mixture (1 tablespoon of flaxseed mixed with 2.5 tablespoons of water equals one egg). This way, you can enjoy the bread while keeping it plant-based.
4. Why is my bread too dense?
If your pear bread turns out too dense, it might be due to overmixing the batter. Mix gently until just combined to ensure a light, fluffy texture. Additionally, make sure your baking powder and baking soda are fresh, as expired leavening agents can lead to a lack of rise.
5. Do I have to peel the pears?
While peeling the pears is recommended for a smoother texture, you can leave the skin on if you prefer a more rustic feel and added fiber. Just be sure to wash them thoroughly before dicing!
6. Can I add nuts or dried fruit?
Definitely! Adding ½ cup of chopped nuts, like walnuts or pecans, or some dried fruit such as raisins or cranberries not only boosts flavor but also adds delightful texture to your pear bread recipe.