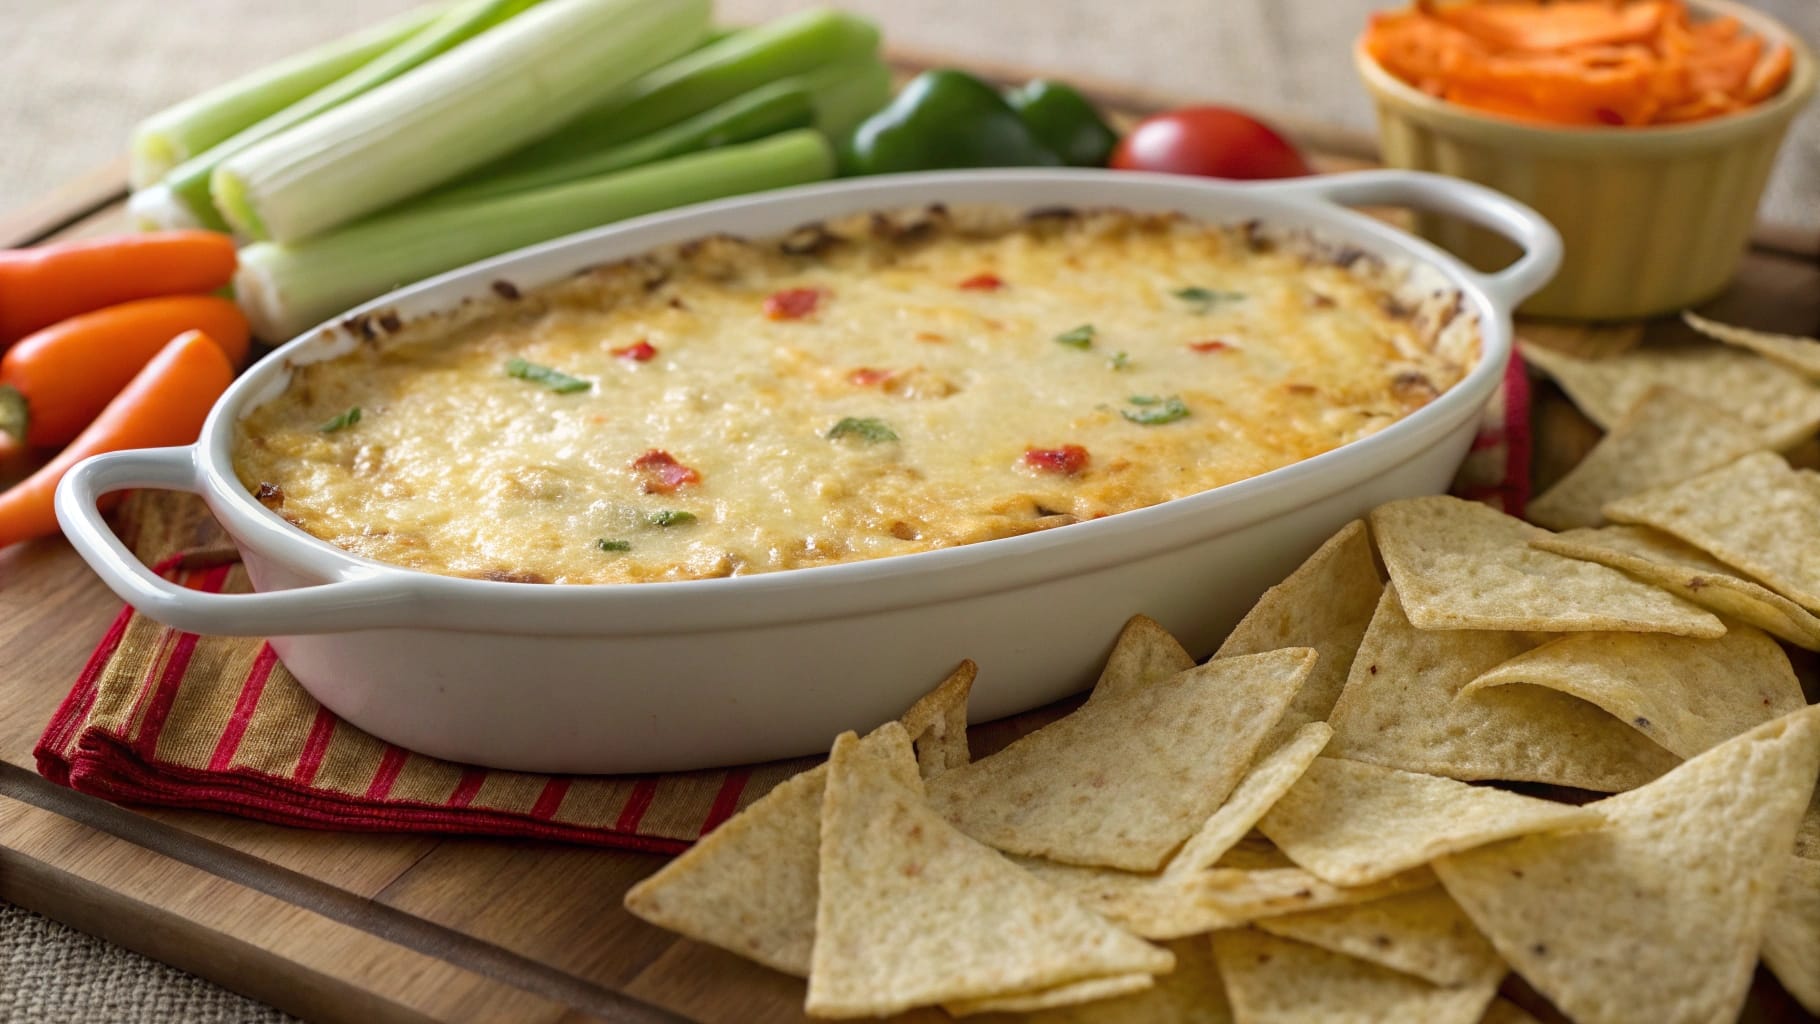
How to Make Cheesy Hissy Fit Dip
Are you ready to impress your guests with a dip that’s not only delicious but also incredibly easy to make? The Cheesy Hissy Fit Dip is a creamy delight that will have everyone coming back for more. Whether you’re hosting a party or just enjoying a cozy night in, this crowd-pleaser is sure to elevate your snacking experience. With its cheesy goodness and versatile pairing options, it’s the perfect appetizer for any gathering. So, let’s dive into this simple yet satisfying recipe that will leave your taste buds dancing!
Table of Contents
Key Benefits of Cheesy Hissy Fit Dip
Let’s talk about why the Cheesy Hissy Fit Dip is a must-have for your next gathering. First and foremost, this dip is a creamy delight that everyone will love. Here are some key benefits that make it a standout:
- Crowd-Pleaser: With its cheesy goodness, the Cheesy Hissy Fit Dip is sure to impress your guests. It’s the kind of dish that brings people together, sparking conversations and smiles.
- Easy Recipe: Not only is it delicious, but it’s also incredibly simple to make. You can whip it up in no time, allowing you to focus on enjoying your time with friends and family.
- Versatility: This dip pairs beautifully with a variety of dippers. Whether you choose tortilla chips, fresh veggies, or slices of bread, the Cheesy Hissy Fit Dip complements them all.
- Flavor Profile: The combination of cheddar and mozzarella cheeses, along with spices, creates a rich flavor that’s hard to resist. Additionally, you can customize it with your favorite herbs or spices for an extra kick.
- Nutritional Value: While it’s indulgent, you can make it a bit healthier by incorporating fresh ingredients. For example, adding some chopped spinach or artichokes can boost its nutritional profile.
In summary, the Cheesy Hissy Fit Dip is not just a dip; it’s an experience. So, gather your ingredients and get ready to create a dish that will have everyone coming back for more!
Ingredients for Cheesy Hissy Fit Dip
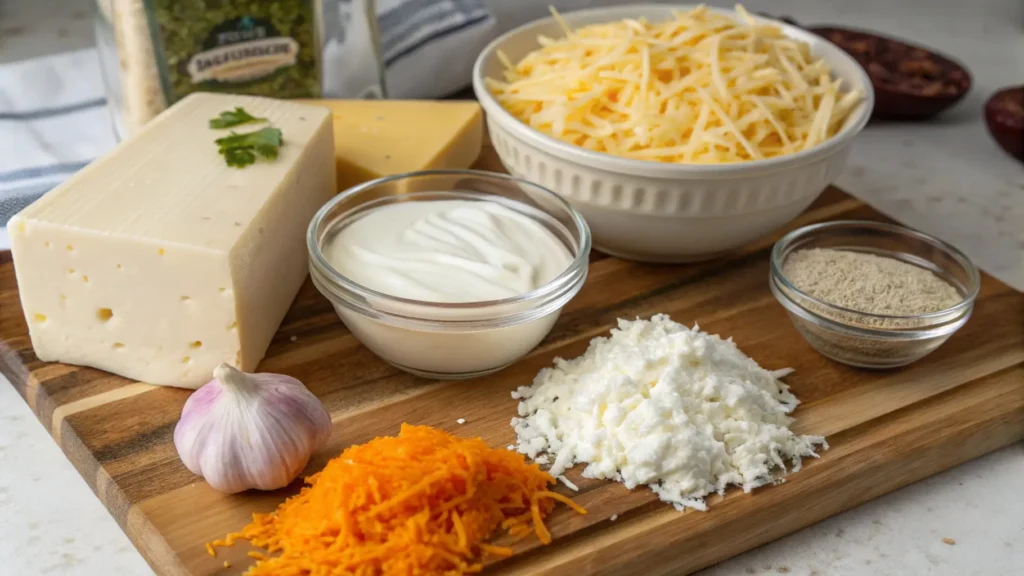
To whip up a delightful Cheesy Hissy Fit Dip, you’ll need a few key ingredients that come together to create a creamy dip bursting with flavor. Here’s what you’ll need:
- 1 cup cream cheese: This is the base of your dip, providing that rich, creamy texture. Make sure it’s softened for easy mixing.
- 1 cup sour cream: Adds a tangy flavor that balances the richness of the cheese. You can use full-fat or light, depending on your preference.
- 1 cup shredded cheddar cheese: A classic choice, cheddar brings a sharp, savory flavor. You can also mix in some sharp and mild cheddar for depth.
- 1 cup shredded mozzarella cheese: This cheese melts beautifully, adding that gooey, cheesy goodness we all love.
- 1 teaspoon garlic powder: For a hint of aromatic flavor, garlic powder is a must. If you prefer fresh, minced garlic works well too.
- 1 teaspoon onion powder: This enhances the overall flavor profile, giving your dip a savory kick.
- Fresh herbs (optional): Chopped chives or parsley can elevate the dip, adding freshness and color.
When selecting your cheeses, opt for high-quality brands for the best flavor. Additionally, if you’re looking for a healthier twist, consider using Greek yogurt instead of sour cream. This substitution will still give you that creamy texture while adding some protein. Also, feel free to experiment with different cheese blends; a mix of pepper jack can add a delightful kick!
Overall, gathering these ingredients will set you on the path to creating a Cheesy Hissy Fit Dip that’s sure to impress your guests. So, let’s get cooking!
How to Make Cheesy Hissy Fit Dip
Making Cheesy Hissy Fit Dip is a delightful experience that’s both simple and rewarding. Follow these easy steps to create a creamy dip that will surely impress your guests!
- Preheat Your Oven: Start by preheating your oven to 350°F (175°C). This step is crucial because it ensures your dip bakes evenly and becomes perfectly bubbly.
- Mix the Base: In a large mixing bowl, combine 8 ounces of softened cream cheese and 1 cup of sour cream. Use a hand mixer or a sturdy spatula to blend them together until smooth. This creamy base is the heart of your Cheesy Hissy Fit Dip!
- Add the Cheese: Next, fold in 1 cup of shredded cheddar cheese and 1 cup of shredded mozzarella cheese. These cheese blends provide that cheesy goodness that makes this dip a crowd-pleaser.
- Season It Up: Sprinkle in 1 teaspoon of garlic powder, 1 teaspoon of onion powder, and a pinch of salt and pepper. Mix everything together until well combined. Remember, tasting as you go is key to achieving the perfect flavor profile!
- Transfer to Baking Dish: Now, transfer your cheesy mixture into a greased baking dish. Spread it out evenly to ensure it bakes uniformly. This step is essential for that golden-brown finish.
- Bake to Perfection: Place the baking dish in the preheated oven and bake for 20-25 minutes. You’ll know it’s ready when the dip is bubbly and the top is golden brown. Keep an eye on it to avoid overbaking!
- Serve Hot: Once baked, remove the dip from the oven and let it cool for a few minutes. Serve it hot with your favorite dippers, such as tortilla chips, fresh vegetables, or slices of crusty bread. This is where the magic happens!
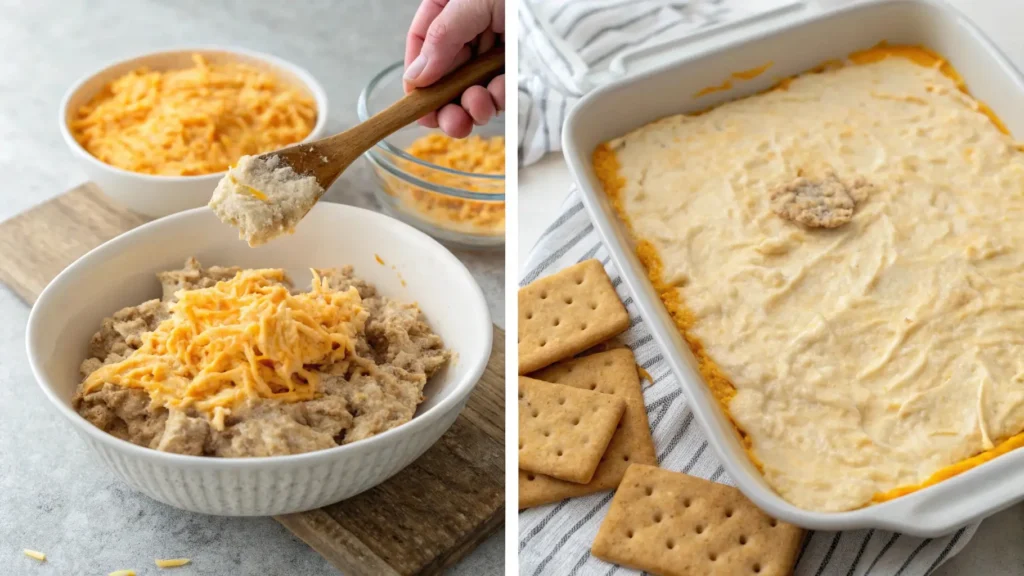
By following these steps, you’ll create a delicious Cheesy Hissy Fit Dip that’s perfect for any gathering. Enjoy the creamy texture and rich flavors that will have everyone coming back for more!
Pro Tips, Variations, and Common Problems
Making the perfect Cheesy Hissy Fit Dip can be a delightful experience, but it’s always good to have some insider tips up your sleeve. Here are some pro tips to elevate your dip game:
- Ingredient Substitutions: If you’re out of sour cream, Greek yogurt works beautifully as a substitute. Additionally, for a lighter version, consider using reduced-fat cream cheese.
- Flavor Enhancements: For an extra kick, add diced jalapeños or a sprinkle of cayenne pepper. You can also mix in some crispy bacon bits for a savory twist!
- Texture Tips: If your dip turns out too thick, simply stir in a splash of milk or cream until you reach your desired consistency. Conversely, if it’s too runny, add a bit more cream cheese to thicken it up.
- Cheese Choices: While cheddar and mozzarella are classic, feel free to experiment with other cheeses like pepper jack for heat or gouda for a smoky flavor.
- Make-Ahead Option: You can prepare the dip a day in advance. Just store it in the fridge, and then bake it right before serving for a fresh, bubbly dip.
Now, let’s address some common problems you might encounter while making Cheesy Hissy Fit Dip:
- Overcooking: To avoid a rubbery texture, keep an eye on your dip while it’s baking. Remove it from the oven as soon as it’s bubbly and golden brown.
- Seasoning Issues: Always taste your dip before serving. If it lacks flavor, add a pinch of salt or a dash of your favorite hot sauce to enhance the taste.
- Cooling Too Quickly: This dip is best served hot. If it cools down too fast, consider placing it in a warm oven or covering it with foil to keep the heat in.
By following these tips and being aware of common pitfalls, you’ll create a Cheesy Hissy Fit Dip that’s sure to impress your guests. Enjoy the cheesy goodness and happy dipping!
Serving Suggestions for Cheesy Hissy Fit Dip
When it comes to serving your Cheesy Hissy Fit Dip, the presentation can elevate the experience from ordinary to extraordinary. Here are some delightful ideas to impress your guests while ensuring that this creamy dip shines as the star of the show.
Plating Ideas
To begin with, consider using a rustic wooden board or a vibrant platter to showcase your dip. This not only adds a touch of charm but also invites everyone to dig in. Additionally, you can place the Cheesy Hissy Fit Dip in a colorful baking dish to enhance its visual appeal. For a fun twist, serve it in individual ramekins, allowing each guest to have their own portion.
Side Dish Pairings
Furthermore, the right accompaniments can make all the difference. Pair your Cheesy Hissy Fit Dip with:
- Tortilla chips for that perfect crunch.
- Fresh vegetable sticks like carrots, celery, and bell peppers for a healthy contrast.
- Crusty bread or baguette slices to soak up every bit of cheesy goodness.
Moreover, consider adding some pickles or olives on the side for a tangy kick that complements the richness of the dip.
Creative Serving Options
Whether you’re hosting a casual get-together or an elegant dinner party, your serving style can set the mood:
- For a casual setting, arrange the dippers in a circle around the dip, encouraging guests to mingle and snack.
- In a more formal setting, serve the Cheesy Hissy Fit Dip as part of a charcuterie board, alongside cured meats and gourmet cheeses.
- For family-style dining, place the dip in the center of the table with a variety of dippers, allowing everyone to help themselves.
Ultimately, the key is to create an inviting atmosphere that encourages sharing and enjoyment.
Presentation Tips
Lastly, don’t forget the finishing touches! Garnish your Cheesy Hissy Fit Dip with freshly chopped herbs like parsley or chives for a pop of color. Additionally, a sprinkle of paprika or crushed red pepper flakes can add visual interest and a hint of spice. Serve with a refreshing beverage, such as iced tea or a light beer, to balance the richness of the dip.
In conclusion, with these serving suggestions, your Cheesy Hissy Fit Dip will not only taste amazing but also look stunning on the table. So, gather your friends and family, and get ready to enjoy this crowd-pleaser at your next gathering!
Preserving and Reheating Cheesy Hissy Fit Dip
To keep your Cheesy Hissy Fit Dip fresh and delicious, proper storage is essential. First, allow the dip to cool completely before transferring it to an airtight container. This step is crucial because it prevents condensation, which can lead to spoilage.
You can store it in the refrigerator for up to three days. If you want to keep it longer, consider freezing it. In that case, use a vacuum-sealed bag or an airtight container, and it will stay fresh for up to three months. However, always label your containers with the date to keep track of freshness. Additionally, remember to check for any signs of spoilage, such as off smells or mold, before consuming. Food safety is paramount, so when in doubt, throw it out!
Reheating Methods
When it comes to reheating your Cheesy Hissy Fit Dip, you have several options to maintain its creamy texture and rich flavor. The oven is a fantastic choice for even heating. Preheat your oven to 350°F (175°C), then place the dip in an oven-safe dish. Cover it with aluminum foil to prevent it from drying out. Heat for about 15-20 minutes, or until it’s warmed through. Alternatively, you can use the stovetop. Simply transfer the dip to a saucepan over low heat, stirring occasionally to ensure it heats evenly.
If you’re in a hurry, the microwave is also effective. Place the dip in a microwave-safe bowl, cover it loosely, and heat in 30-second intervals, stirring in between, until hot. Lastly, if you have an air fryer, you can reheat it at 300°F (150°C) for about 5-7 minutes. Regardless of the method, consider adding a splash of milk or cream to refresh the dip and enhance its creaminess. This simple trick will help you enjoy your Cheesy Hissy Fit Dip just as much as when it was freshly made!
Conclusion
In conclusion, making the Cheesy Hissy Fit Dip is a delightful journey that combines creamy goodness with simple steps. You start by mixing a luscious blend of cream cheese, sour cream, and your favorite cheeses, then bake it to bubbly perfection. This easy recipe is not only a crowd-pleaser but also incredibly versatile, allowing you to customize it with spices or add-ins like jalapeños or bacon bits. So, whether you’re hosting a party or just looking for a cozy snack, this dip is a fantastic choice that invites creativity in the kitchen.
Now, I encourage you to try making this delicious dip yourself! Don’t hesitate to share your results or ask any questions you might have along the way. Remember, cooking is all about experimenting and having fun, so feel free to play with different dippers or pairings to make it your own. Overall, the Cheesy Hissy Fit Dip is a wonderful way to bring people together, and I can’t wait to hear how it turns out for you!
ungry for more delicious creations? Browse our site for (more recipes) and endless inspiration to spark your next culinary adventure!
FAQs about Cheesy Hissy Fit Dip
Here are some common questions about the Cheesy Hissy Fit Dip, along with helpful answers to enhance your experience!
Can I make this dip vegetarian?
Absolutely! You can easily make the Cheesy Hissy Fit Dip vegetarian by omitting any meat ingredients. This way, everyone can enjoy its creamy goodness.
How can I make it spicier?
If you’re looking to add some heat, consider adding diced jalapeños or a dash of your favorite hot sauce. This will elevate the flavor profile and give it a delightful kick!
What’s the best way to serve leftovers?
For the best experience, reheat your Cheesy Hissy Fit Dip in the microwave or oven until heated through. Serve it again with fresh dippers for a quick and tasty snack.
Can I prepare this dip in advance?
Yes, you can prepare the Cheesy Hissy Fit Dip ahead of time! Simply mix all the ingredients and store them in an airtight container in the fridge. When you’re ready to serve, just bake it until bubbly.
What are some good dippers for this dip?
This dip pairs wonderfully with a variety of dippers. Tortilla chips, fresh vegetables, and slices of crusty bread are all excellent choices. Feel free to get creative with your accompaniments!

Cheesy Hissy Fit Dip
Equipment
- 1 Mixing Bowl For combining ingredients.
- 1 Baking Dish Greased for baking the dip.
- 1 Hand Mixer or Spatula For mixing the dip ingredients.
Ingredients
Base Ingredients
- 1 cup cream cheese Softened for easy mixing.
- 1 cup sour cream Can use full-fat or light.
Cheese Ingredients
- 1 cup shredded cheddar cheese For sharp, savory flavor.
- 1 cup shredded mozzarella cheese Adds gooey, cheesy goodness.
Seasoning
- 1 teaspoon garlic powder For aromatic flavor.
- 1 teaspoon onion powder Enhances overall flavor.
- to taste salt and pepper For seasoning.
Optional Ingredients
- to taste fresh herbs Chopped chives or parsley.
Instructions
Preparation Steps
- Preheat your oven to 350°F (175°C).
- In a large mixing bowl, combine softened cream cheese and sour cream until smooth.
- Fold in shredded cheddar and mozzarella cheeses.
- Sprinkle in garlic powder, onion powder, salt, and pepper. Mix well.
- Transfer the mixture to a greased baking dish and spread evenly.
- Bake for 20-25 minutes until bubbly and golden brown.
- Let cool for a few minutes and serve hot with dippers.
Notes
| Calories | Fat | Protein | Carbs |
|---|---|---|---|
| 250 | 20g | 10g | 5g |

