Coxinha: A Flavorful Journey into Brazilian Cuisine
Have you ever tasted a coxinha? This delightful Brazilian snack is not only a savory pastry but also a flavor-packed treat that brings people together. Whether you’re hosting a party or simply craving something delicious, coxinha is the perfect choice. Moreover, its versatility allows for various fillings, making it a crowd-pleaser for everyone. In this recipe, we’ll explore how to create authentic , ensuring you avoid soggy dough disasters along the way. So, let’s embark on this culinary adventure and discover the joy of making homemade !
Table of Contents

Key Benefits
Ah, coxinha! This delightful Brazilian snack is not just a treat for your taste buds; it’s a culinary experience that brings people together. Here are some key benefits that make coxinha a must-try:
- Flavor-Packed: Each bite of coxinha bursts with savory goodness. The combination of tender chicken and spices wrapped in a crispy dough is simply irresistible.
- Crowd-Pleaser: Whether you’re hosting a party or just having friends over, coxinha is sure to impress. It’s a snack that everyone loves, making it perfect for gatherings.
- Versatile Dish: You can customize coxinha with various fillings, from traditional chicken to cheese or even vegetables. This versatility allows you to cater to different tastes and dietary preferences.
- Cultural Heritage: Making coxinha is a wonderful way to connect with Brazilian culture. Each bite tells a story, and sharing this dish with others can spark conversations about culinary traditions.
- Fun to Make: The process of preparing coxinha can be a joyful experience. Gather your loved ones, roll up your sleeves, and enjoy the art of cooking together!
Incorporating coxinha into your cooking repertoire not only enhances your culinary skills but also brings a taste of Brazil to your home. So, why not give it a try? You’ll be glad you did!
Ingredients
Making authentic coxinha is all about using the right ingredients. Each component plays a crucial role in creating that delightful flavor-packed Brazilian snack. Here’s what you’ll need:
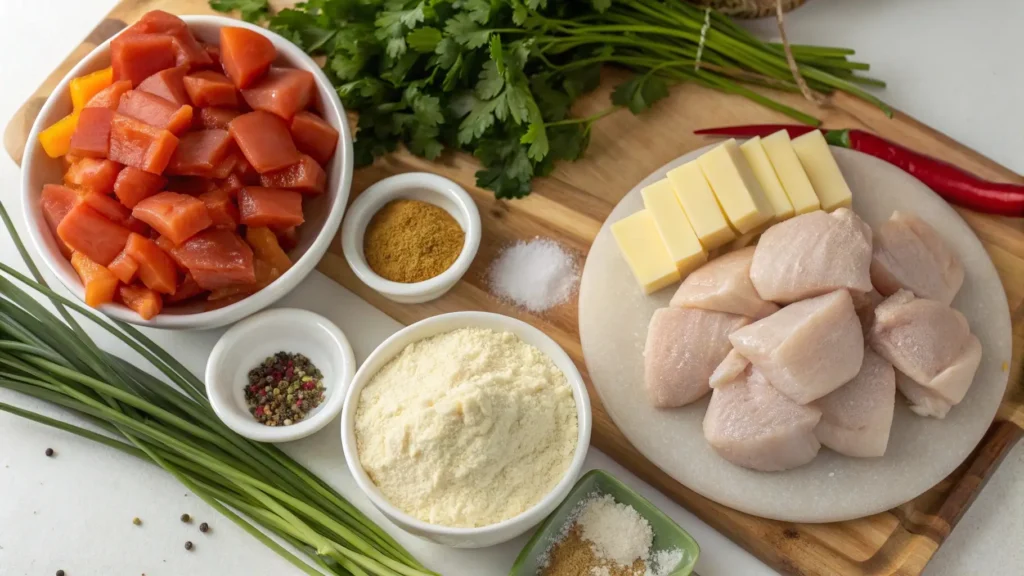
- For the Dough:
- 2 cups all-purpose flour
- 4 tablespoons unsalted butter
- 1 cup chicken broth (homemade is best!)
- 1/2 teaspoon salt
- For the Filling:
- 2 cups cooked chicken, shredded
- 1 small onion, finely chopped
- 2 cloves garlic, minced
- 1/2 cup cream cheese (for extra creaminess)
- 1/4 cup fresh parsley, chopped
- Salt and pepper to taste
- For Coating:
- 1 cup breadcrumbs
- 2 eggs, beaten
- Oil for frying
When selecting your ingredients, freshness is key. For instance, using homemade chicken broth enhances the flavor significantly. If you’re short on time, store-bought broth will work, but opt for low-sodium varieties to control the saltiness. Additionally, feel free to experiment with the filling! You can substitute the chicken with shredded cheese or even vegetables for a vegetarian twist.
Moreover, ensure your flour is of good quality; this will affect the dough’s texture. If you’re gluten-free, there are excellent gluten-free flour blends available that can be used as a substitute. Lastly, don’t skimp on the butter; it adds richness to the dough that makes coxinha irresistible!
How to Make
Making coxinha is a delightful journey into Brazilian cuisine. Follow these simple steps to create this flavor-packed savory pastry that will impress your friends and family!
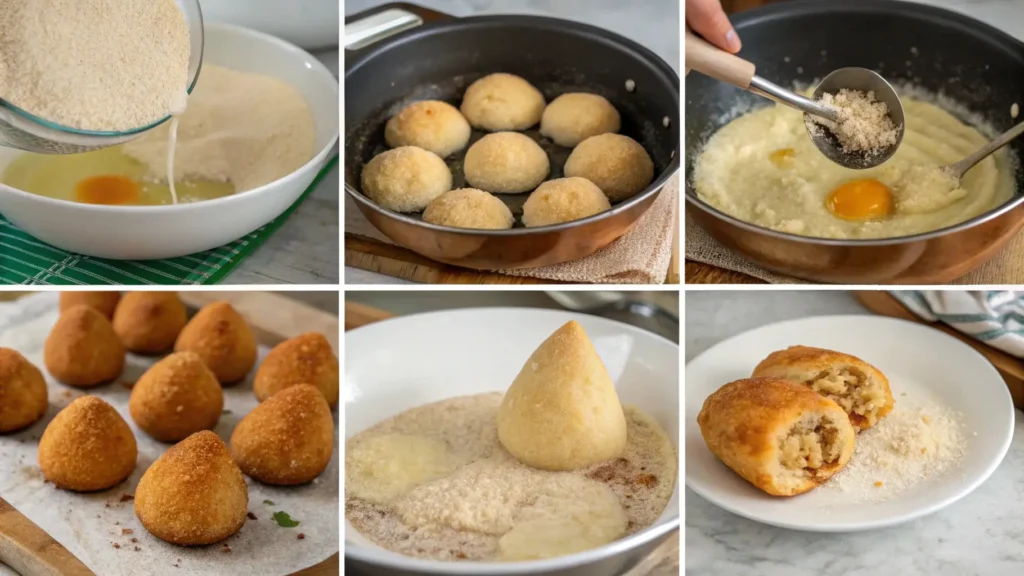
- Prepare the Dough: In a saucepan, combine 2 cups of chicken broth, 1 tablespoon of butter, and a pinch of salt. Bring it to a gentle boil. Once boiling, gradually add 2 cups of flour, stirring continuously. This will help avoid lumps. Cook for about 5 minutes until the dough pulls away from the sides of the pan.
- Let it Cool: Transfer the dough to a floured surface and let it cool for about 10-15 minutes. This step is crucial because working with hot dough can be tricky. So, be patient!
- Prepare the Filling: While the dough cools, shred 2 cups of cooked chicken. In a skillet, sauté 1 chopped onion and 2 cloves of minced garlic until fragrant. Add the chicken, 1 teaspoon of paprika, and salt to taste. Mix well and let it cool.
- Shape the Coxinha: Once the dough is cool, take a small piece (about the size of a golf ball) and flatten it in your palm. Place a spoonful of the chicken filling in the center. Fold the dough over the filling and pinch the edges to seal. Form it into a teardrop shape. This technique is key to achieving that classic coxinha look!
- Coat the Coxinha: Prepare a breading station with one bowl of beaten eggs and another with breadcrumbs. Dip each coxinha in the egg, then coat it with breadcrumbs. This step adds a delightful crunch!
- Fry the Coxinha: Heat oil in a deep pan to 350°F (175°C). Fry the coxinhas in batches until golden brown, about 4-5 minutes. Make sure not to overcrowd the pan, as this can lower the oil temperature and lead to soggy dough.
- Drain and Serve: Once golden, remove the coxinhas and place them on paper towels to drain excess oil. Serve them hot with your favorite dipping sauce. Enjoy the crispy exterior and the savory filling!
By following these steps, you’ll create delicious coxinhas that are sure to be a crowd-pleaser. Remember, practice makes perfect, so don’t hesitate to try again if your first batch isn’t flawless. Happy cooking!
Pro Tips, Variations, and Common Problems
Making coxinha can be a delightful culinary adventure, but it’s not without its challenges. Here are some pro tips and variations to help you create the perfect batch, along with solutions to common problems you might encounter.
Pro Tips
– Dough Consistency: The dough should be smooth and pliable. If it feels too sticky, add a little more flour. Conversely, if it’s too dry, a splash of broth can help. Remember, the right texture is key to avoiding soggy dough disasters!
– Filling Flavor: Season your chicken filling generously. Use spices like paprika, cumin, or even a touch of lime juice for a flavor-packed experience. Additionally, consider adding sautéed onions or garlic for depth.
– Shaping Techniques: When shaping your coxinha, ensure the filling is well-sealed within the dough. This prevents leaks during frying. If you’re having trouble, try using a little water to moisten the edges before sealing.
Creative Variations
– Filling Swaps: While traditional coxinha is filled with chicken, feel free to experiment! Try cheese, mushrooms, or even a mix of vegetables for a vegetarian option. Each variation offers a unique twist on this beloved Brazilian snack.
– Dough Alternatives: For a gluten-free version, substitute regular flour with a gluten-free blend. Just be aware that the texture may vary slightly, but it can still be delicious!
Troubleshooting Common Problems
– Soggy Dough: If your coxinha turns out soggy, it may be due to overcooking the filling or not allowing the dough to cool sufficiently before shaping. Always let the filling cool completely, and ensure the dough is cooked just right.
– Burnt Exterior: If the outside of your coxinha burns while the inside remains uncooked, check your frying temperature. Ideally, the oil should be hot enough to cook the coxinha quickly without burning. A good test is to drop a small piece of dough into the oil; it should sizzle immediately.
– Underseasoned Filling: If your filling lacks flavor, don’t hesitate to adjust the seasoning after tasting. A pinch of salt or a dash of hot sauce can elevate the taste significantly.
By following these tips and being mindful of common pitfalls, you’ll be well on your way to mastering the art of coxinha. Enjoy the process, and don’t forget to share your delicious creations with friends and family!
Serving Suggestions
When it comes to serving coxinha, the possibilities are as delightful as the snack itself! This Brazilian treat is not only a flavor-packed crowd-pleaser but also a versatile dish that can fit any occasion. Here are some engaging serving ideas that will surely impress your guests.
Plating Ideas
To make your coxinha visually appealing, consider these plating tips:
- Arrange coxinhas on a large, colorful platter. This creates an inviting centerpiece for your table.
- Garnish with fresh herbs like parsley or cilantro. Not only does this add a pop of color, but it also enhances the aroma.
- For a rustic touch, serve coxinha in a woven basket lined with parchment paper. This gives a warm, homey feel.
Side Dish Pairings
Complement your recipe with these delicious side dishes:
- Pair with a refreshing salad, such as a simple arugula salad with lemon vinaigrette. This balances the richness .
- Serve alongside a zesty dipping sauce, like spicy aioli or tangy chimichurri. These sauces elevate the flavor experience.
- Consider adding some fried plantains or sweet potato fries for a sweet contrast to the savory pastry.
Creative Serving Options
Depending on the occasion, you can present coxinha in various styles:
- For a casual gathering, set up a coxinha bar. Include different dipping sauces and toppings, allowing guests to customize their bites.
- For an elegant affair, serve coxinha on individual appetizer spoons. This adds a sophisticated touch and makes for easy eating.
- During family-style meals, place a large bowl of coxinha in the center of the table. This encourages sharing and conversation.
Ultimately, serving coxinha is all about creativity and presentation. By incorporating these ideas, you’ll not only enhance the visual appeal but also create a memorable dining experience that showcases the rich cultural heritage of this beloved Brazilian snack.
Preserving and Reheating : Keep the Flavor Alive!
When it comes to enjoying coxinha, proper storage and reheating are essential to maintaining that delightful flavor and texture. After all, you want to savor every bite of this Brazilian snack, right? So, let’s dive into how to store and reheat coxinha like a pro!
Storage Tips
To keep your coxinha fresh, start by storing it in an airtight container. If you plan to eat them within a few days, refrigeration is your best bet. Coxinha can stay fresh in the fridge for about 3 to 5 days. However, if you want to enjoy them later, freezing is the way to go. When properly sealed, coxinha can last in the freezer for up to 3 months. For optimal freshness, consider vacuum-sealing them. This method removes air and helps prevent freezer burn, ensuring your coxinha retains its deliciousness.
Moreover, always remember to let your coxinha cool completely before storing. This step is crucial because it prevents condensation, which can lead to soggy dough. Additionally, label your containers with the date, so you know when to enjoy them by. Food safety is paramount, so be sure to check for any signs of spoilage before indulging!
Reheating Methods
Now, let’s talk about reheating your coxinha without turning them into soggy disasters! The oven is one of the best methods for reheating. Preheat your oven to 375°F (190°C). Place the coxinha on a baking sheet lined with parchment paper, and heat them for about 10 to 15 minutes. This method helps restore that crispy exterior while keeping the filling warm and flavorful.
If you’re short on time, the air fryer is another fantastic option. Set it to 350°F (175°C) and cook for about 5 to 7 minutes. This method is quick and ensures a crispy finish. Alternatively, you can reheat coxinha on the stovetop. Heat a non-stick skillet over medium heat, and add a splash of water. Cover the skillet with a lid to create steam, which helps warm the filling without drying out the dough. Cook for about 5 minutes, checking occasionally.
While the microwave is convenient, it can lead to a soggy texture. If you must use it, place a damp paper towel over the coxinha and heat in short intervals, checking frequently. This technique adds moisture and helps prevent drying out. Remember, the key is to reheat at a low temperature to maintain that delicious flavor and texture!
In conclusion, with these storage and reheating tips, you can enjoy your coxinha just as much as the day you made them. So, go ahead and savor every bite of this flavor-packed Brazilian delight!
Conclusion
As you wrap up your culinary adventure with homemade , let’s take a moment to reflect on the delightful journey you’ve just embarked upon. This recipe, with its simple yet flavorful dough and savory chicken filling, showcases the beauty of Brazilian cuisine. By following the step-by-step guide, you’ve mastered the art of shaping and frying these delicious pastries, proving that cooking can be both fun and rewarding. Moreover, coxinha is a versatile dish that invites creativity; feel free to experiment with different fillings or spices to suit your taste. So, whether you’re preparing them for a gathering or simply indulging in a personal treat, you can be proud of your creation.
I encourage you to share your results with friends and family or ask any questions you might have along the way. Remember, cooking is a journey, and each attempt brings you closer to perfection. Additionally, consider pairing your coxinha with a variety of dipping sauces or serving them as part of a vibrant appetizer platter. The possibilities are endless! Ultimately, the joy of making lies not only in the delicious outcome but also in the memories created in the kitchen. So, gather your ingredients, roll up your sleeves, and dive into this flavorful experience. Happy cooking!
Hungry for more delicious creations? Browse our site for (more recipes) and endless inspiration to spark your next culinary adventure!

coxinha
Ingredients
Dough
- 2 cups all-purpose flour Ensure good quality for best texture.
- 4 tablespoons unsalted butter Adds richness to the dough.
- 1 cup chicken broth Homemade is best for flavor.
Filling
- 2 cups cooked chicken Shredded.
- 1 small onion Finely chopped.
- 2 cloves garlic Minced.
- 1/2 cup cream cheese For extra creaminess.
- 1/4 cup fresh parsley Chopped.
- to taste salt and pepper For seasoning.
Coating
- 1 cup breadcrumbs For coating.
- 2 eggs beaten For egg wash.
- as needed oil for frying Heat to 350°F (175°C).
Instructions
Prepare the Dough
- In a saucepan, combine 2 cups of chicken broth, 1 tablespoon of butter, and a pinch of salt. Bring it to a gentle boil. Once boiling, gradually add 2 cups of flour, stirring continuously. Cook for about 5 minutes until the dough pulls away from the sides of the pan.
Let it Cool
- Transfer the dough to a floured surface and let it cool for about 10-15 minutes.
Prepare the Filling
- While the dough cools, shred 2 cups of cooked chicken. In a skillet, sauté 1 chopped onion and 2 cloves of minced garlic until fragrant. Add the chicken, 1 teaspoon of paprika, and salt to taste. Mix well and let it cool.
Shape the Coxinha
- Once the dough is cool, take a small piece (about the size of a golf ball) and flatten it in your palm. Place a spoonful of the chicken filling in the center. Fold the dough over the filling and pinch the edges to seal. Form it into a teardrop shape.
Coat the Coxinha
- Prepare a breading station with one bowl of beaten eggs and another with breadcrumbs. Dip each coxinha in the egg, then coat it with breadcrumbs.
Fry the Coxinha
- Heat oil in a deep pan to 350°F (175°C). Fry the coxinhas in batches until golden brown, about 4-5 minutes.
Drain and Serve
- Once golden, remove the coxinhas and place them on paper towels to drain excess oil. Serve them hot with your favorite dipping sauce.
Video
Notes
What is coxinha?
Coxinha is a beloved Brazilian snack, often shaped like a chicken drumstick. It features a savory filling, typically made with shredded chicken, and is encased in a flavorful dough. This delightful pastry is usually deep-fried until golden brown, making it a crowd-pleaser at parties and gatherings.
How do I prevent my coxinha dough from being soggy?
To avoid soggy dough, ensure that your dough is cooked properly before shaping. Additionally, use the right amount of broth; too much can lead to excess moisture. Also, let the coxinhas cool slightly before frying, as this helps maintain their texture.
Can I make coxinha ahead of time?
Absolutely! You can prepare the recipe in advance. Just shape them and place them on a baking sheet. Then, cover and refrigerate for up to 24 hours. For longer storage, freeze them before frying. When ready to enjoy, fry them straight from the freezer for a crispy finish.
What are some popular variations ?
Coxinha is quite versatile! While the classic version features chicken, you can experiment with fillings like cheese, vegetables, or even beef. Additionally, some people enjoy adding spices or herbs to the dough for extra flavor.
What are some popular variations ?
Coxinha is quite versatile! While the classic version features chicken, you can experiment with fillings like cheese, vegetables, or even beef. Additionally, some people enjoy adding spices or herbs to the dough for extra flavor.
What dipping sauces pair well ?
For a delightful experience, serve coxinha with various dipping sauces. Popular choices include spicy ketchup, garlic mayonnaise, or a tangy chimichurri. These sauces enhance the flavor and make your coxinha even more enjoyable!


