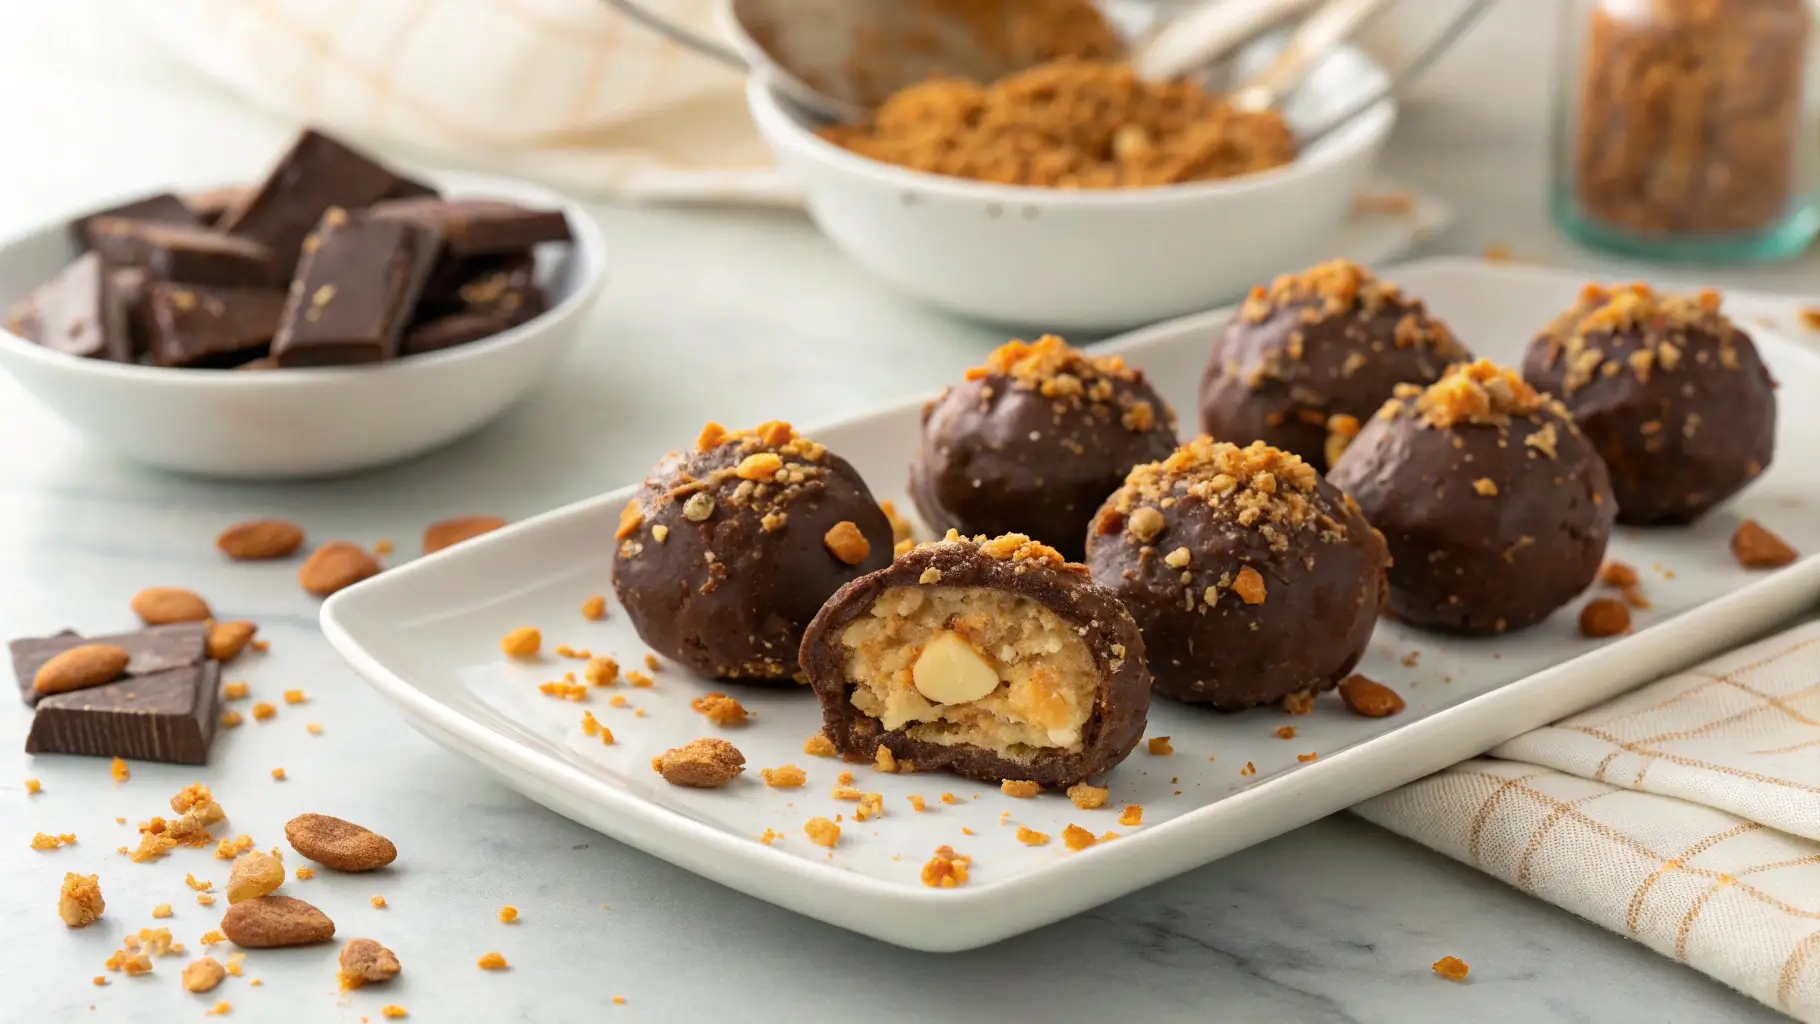
Butterfinger Balls Recipe for Happy Choco Bites and Love
Welcome to a delightful culinary adventure featuring our Butterfinger Balls Recipe for Happy Choco Bites and Love! Have you ever wondered how a simple no‐bake dessert could turn into a decadent homemade candy?
I still remember the first time I made these sweet treats—each bite burst with a perfect harmony of peanut butter and cream cheese, instantly winning my heart. Beyond their irresistible taste, these choco delights bring a fun twist to traditional desserts, blending nutritional benefits with joyful indulgence.
Ready to create a recipe that’s both versatile and delightful? Let’s dive in and turn a few simple ingredients into a memorable treat that warms every gathering with smiles!
Table of Contents
Key Benefits of Butterfinger Balls Recipe
Discover why this no‐bake dessert is a game-changer in your culinary repertoire. Not only is it a fun and innovative way to indulge your sweet tooth, but it also offers several practical and nutritional benefits that make it a perfect addition to your recipe collection. Here’s why you should try this butterfinger balls recipe:
Simple & Quick:
Easy Preparation: This recipe requires no baking, making it ideal for busy days or spontaneous gatherings.
Minimal Equipment: All you need are basic kitchen tools, which means less time cleaning up and more time enjoying your treat.
Versatile & Adaptable:
Customizable: Whether you’re catering to gluten-free or vegan dietary needs, you can easily swap out ingredients without compromising the delightful flavor.
For tips on adapting recipes to gluten-free or vegan lifestyles, visit the Celiac Disease Foundation for gluten-free advice and The Vegan Society’s guide for
Perfect for Any Occasion: These choco bites work great as an after-dinner dessert, a party snack, or even a fun treat to share with family and friends.
Nutritional Perks:
Balanced Indulgence: Combining the creamy goodness of cream cheese and peanut butter with the crunch of Butterfinger pieces, you get a satisfying treat that offers both protein and a burst of energy.
Portion Control: By making bite-sized balls, you can enjoy a little indulgence without overdoing it, keeping your diet balanced.
Engaging & Fun Experience:
Interactive Cooking: The step-by-step process makes it enjoyable to prepare, whether you’re cooking solo or with company.
Visual Appeal: With its vibrant colors and creative presentation, these treats are sure to impress on any dessert table.
Overall, this butterfinger balls recipe not only delights your taste buds but also brings practicality and flexibility to your kitchen. So, why not add this innovative dessert to your recipe arsenal and enjoy the benefits it brings to your everyday culinary adventures?
Ingredients for Butterfinger Balls Recipe
Before you begin, let’s gather all the ingredients needed to create these irresistible choco bites. This no‐bake dessert is designed for simplicity and adaptability, making it easy to customize for gluten-free or vegan needs. Here’s what you’ll need:
Butterfinger Candy:
1 cup of finely chopped Butterfinger candy (about 2–3 bars)
Note: For a twist, consider using your favorite crunchy candy bar as an alternative.
Creamy Base:
8 oz (225 g) cream cheese, softened to room temperature
½ cup smooth peanut butter
1 teaspoon vanilla extract
Sweet Binder:
2 to 3 cups powdered sugar (start with 2 cups and add gradually until you achieve a rollable consistency)
Chocolate Coating:
1 ½ cups semi-sweet chocolate chips
1 tablespoon unsalted butter
Tip: If you prefer a dairy-free version, substitute dairy butter with a plant-based butter alternative and use vegan chocolate chips.
Using these ingredients, you can effortlessly blend flavors and textures to create a treat that’s both delightful and adaptable. As you prepare each item, remember that these ingredients not only offer a unique taste experience but also allow for creative variations, ensuring your butterfinger balls recipe stands out every time.
How to Make Butterfinger Balls Recipe
Follow these simple, step-by-step instructions to create your own irresistible choco treats. This no‐bake dessert is both fun and easy, making it a perfect project for any day!
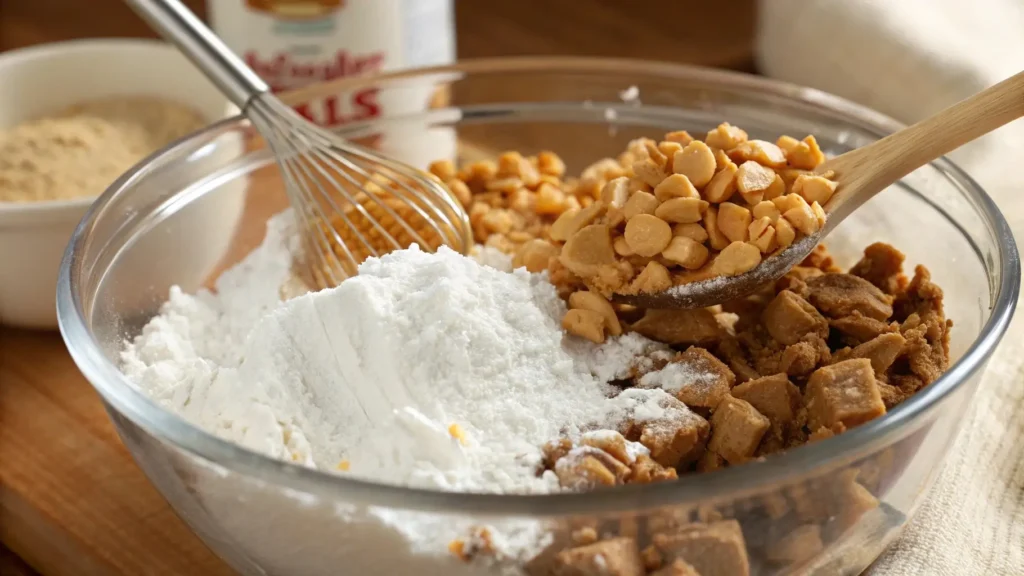
Mix the Base:
In a large bowl, combine 8 oz of softened cream cheese, ½ cup smooth peanut butter, and 1 teaspoon vanilla extract.
Stir until the mixture is smooth and creamy.
Gradually fold in 2 cups of powdered sugar, adding more if necessary, until you achieve a thick, pliable dough.
Finally, mix in 1 cup of finely chopped Butterfinger candy, ensuring even distribution.
Form the Balls:
Scoop about 1 tablespoon of the mixture and roll it between your palms to create a 1-inch ball.
Arrange the balls on a parchment-lined tray.
For the best texture, refrigerate the balls for at least 30 minutes, which helps them firm up before coating.
Prepare the Chocolate Coating:
In a microwave-safe bowl, combine 1 ½ cups of semi-sweet chocolate chips with 1 tablespoon of unsalted butter.
Microwave in 30-second bursts, stirring between intervals until the chocolate is completely melted and smooth.
Alternatively, use a double boiler for a gentler melting process.
Coat the Balls:
Using a fork or a small dipping tool, dip each chilled ball into the melted chocolate, ensuring a full, even coating.
Allow any excess chocolate to drip off before returning the balls to the tray.
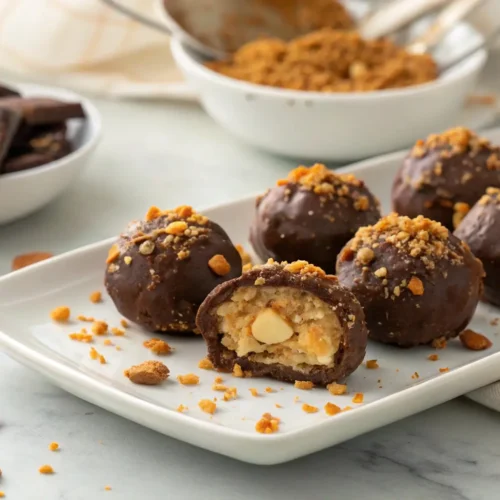
Final Chill and Serve:
Place the chocolate-coated balls back into the refrigerator for another 15–20 minutes to let the coating set perfectly.
Once set, they are ready to enjoy!
For an extra touch, consider sprinkling a few extra chopped Butterfinger pieces or a dash of sea salt on top before the final chill.
By following these actionable steps and utilizing smooth transitions, you’ll create a dessert that not only tastes fantastic but also looks visually appealing. Enjoy your delicious butterfinger balls recipe and feel free to share your creative variations with friends and family!
Pro Tips and Variations
Enhance your butterfinger balls recipe with these expert tips and creative variations that will elevate your dessert game:
Expert Tips for Perfect Results:
Chill Thoroughly: Ensure the balls are well-chilled before dipping to prevent the chocolate from melting too quickly.
Consistent Texture: Gradually add powdered sugar to reach a firm yet pliable dough, which is essential for forming uniform balls.
Smooth Coating: Stir the chocolate frequently while melting it; this prevents any scorching and guarantees a smooth, glossy finish.
Creative Variations:
Nutty Crunch: For an extra crunch, mix in finely chopped almonds or walnuts into the base before rolling the balls.
Spicy Kick: Add a pinch of cayenne pepper or cinnamon to the dough for a subtle spicy twist that contrasts with the sweetness.
Vegan Option: Swap out cream cheese and butter with their dairy-free alternatives, and use vegan chocolate chips for a plant-based version.
Flavor Boost: Experiment with a dash of espresso powder or a drop of almond extract to enhance the overall flavor profile.
Actionable Insights:
Quick Fixes: If your mixture is too sticky, add a bit more powdered sugar; if too dry, a small spoonful of peanut butter can help bring it together.
Customization: Don’t hesitate to try different types of candy or chocolate; personalizing the recipe can make your butterfinger balls truly unique.
Presentation: Garnish your final product with a sprinkle of crushed candy pieces or a light dusting of powdered sugar for an extra visual appeal.
These pro tips and variations not only ensure that you get the perfect texture and taste every time, but also empower you to make this dessert your own. Enjoy experimenting with these ideas and have fun creating a dessert that’s as versatile and delightful as it is delicious!
Serving Suggestions
Elevate your butterfinger balls recipe with creative serving ideas that transform this no‐bake dessert into a show-stopping treat:
Ideal Pairings:
With Fresh Fruits: Serve these choco treats alongside a bowl of mixed berries or sliced apples to add a refreshing contrast.
With a Cool Beverage: Pair them with a glass of cold milk, iced coffee, or a non-alcoholic smoothie to balance the sweetness.
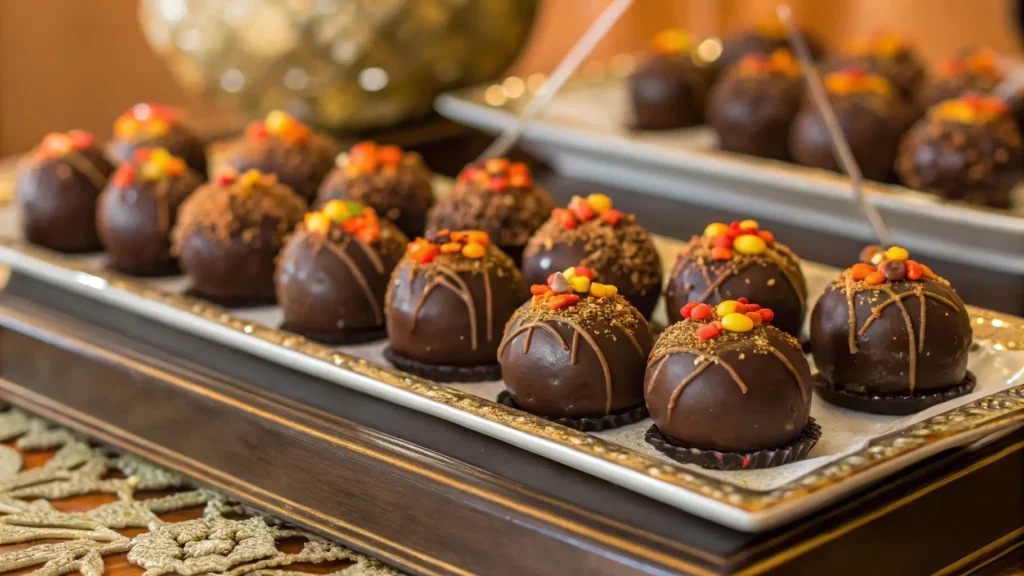
Presentation Tips:
Garnish Creatively: Sprinkle a few extra chopped Butterfinger pieces or a light dusting of powdered sugar over the finished treats for an appealing look.
Elegant Plating: Arrange the balls on a decorative platter with a drizzle of melted chocolate or a side of fruit coulis for a professional finish.
Occasion Ideas:
Party Treats: Present these bites on a tiered dessert stand at your next gathering for a visually enticing display.
Everyday Indulgence: Enjoy them as a mid-day snack or a quick dessert after dinner, adding a fun twist to your routine.
By incorporating these serving suggestions, you not only enhance the overall appeal of your dessert but also provide a delightful experience that can be customized for any occasion. Enjoy your creative journey with this versatile butterfinger balls recipe and let your imagination add the final flourish!
Common Problems and Solutions
Even the best recipes can sometimes hit a snag. Here are some common issues you might encounter with your butterfinger balls recipe—and practical solutions to keep your dessert on track:
Problem: Sticky Dough
Solution: If the mixture feels too sticky, gradually add more powdered sugar. This adjustment will firm up the dough, making it easier to roll into uniform balls.
Problem: Uneven Chocolate Coating
Solution: To achieve a smooth and consistent coating, ensure the balls are well-chilled before dipping. Stir the melted chocolate frequently and use a fork or dipping tool to allow excess chocolate to drip off evenly.
Problem: Overly Soft Texture
Solution: If your butterfinger balls seem too soft, extend the initial refrigeration time by an extra 10 minutes. This additional chill time will help the balls set properly and maintain their shape during coating.
Problem: Chocolate Hardening Too Quickly
Solution: Work in small batches when dipping to prevent the chocolate from hardening before all balls are coated. You can also keep the melted chocolate warm by using short microwave bursts if needed.
Problem: Inconsistent Flavor Balance
Solution: If the balance of peanut butter, cream cheese, and candy pieces isn’t quite right, adjust the ingredients gradually. Add a bit more peanut butter or cream cheese to achieve a creamier texture, or increase the Butterfinger pieces for extra crunch and flavor.
By addressing these common issues with actionable solutions, you can confidently tackle any challenges while preparing your butterfinger balls recipe. Enjoy the process, experiment with small tweaks, and soon you’ll master the art of creating these delightful choco treats!
Conclusion
In wrapping up your butterfinger balls recipe adventure, it’s clear that creating these delightful choco treats is not only fun but also incredibly rewarding. By following each step and implementing the practical tips shared throughout this guide, you’ve mastered a no‐bake dessert that marries convenience with creative flair.
Key Takeaways:
Enjoy the simplicity and versatility of the recipe, making it perfect for any occasion.
Experiment with the pro tips and variations to suit your unique taste preferences.
Use the serving suggestions to elevate the presentation and share a truly memorable dessert with friends and family.
Hungry for more delicious creations? Browse our site for (more recipes) and endless inspiration to spark your next culinary adventure!
As you savor each bite, remember that cooking is all about experimentation and personalization. I encourage you to share your experiences and any creative twists you’ve tried with this recipe. Ready to impress everyone with your choco creations? Dive into the recipe and let the delicious journey begin!
Butterfinger Balls Recipe
Ingredients
Butterfinger Candy:
- 1 cup finely chopped Butterfinger candy about 2–3 bars
- 💡 Tip: Swap with your favorite crunchy candy bar for a unique twist!
Creamy Base:
- 8 oz 225g cream cheese, softened
- ½ cup smooth peanut butter
- 1 teaspoon vanilla extract
Sweet Binder:
- 2 to 3 cups powdered sugar start with 2 cups, add more if needed
Chocolate Coating:
- 1 ½ cups semi-sweet chocolate chips
- 1 tablespoon unsalted butter
- 🌱 Vegan Alternative: Use dairy-free butter and vegan chocolate chips.
Instructions
Mix the Base 🥣
- In a large bowl, mix cream cheese, peanut butter, and vanilla extract until smooth.
- Gradually fold in 2 cups of powdered sugar, adding more if needed, until a thick dough forms.
- Stir in chopped Butterfinger candy for an even distribution of crunch.
Form the Balls 🍪
- Scoop 1 tablespoon of dough and roll into a 1-inch ball.
- Place on a parchment-lined tray.
- Refrigerate for at least 30 minutes to firm up before coating.
Prepare the Chocolate Coating 🍫
- In a microwave-safe bowl, melt chocolate chips and butter in 30-second bursts, stirring between intervals.
- Alternatively, use a double boiler for smoother melting.
Coat the Balls 🎯
- Using a fork, dip each chilled ball into the melted chocolate, coating evenly.
- Let excess chocolate drip off before placing back on the tray.
Final Chill and Serve ❄️
- Refrigerate for 15–20 minutes until the chocolate sets.
Video
Notes
✅ Chill Thoroughly: Keeps the dough firm for easier dipping.
✅ Perfect Texture: Adjust powdered sugar for a rollable consistency.
✅ Smooth Chocolate: Stir frequently while melting for a glossy finish. Creative Variations:
🌰 Nutty Crunch: Add chopped almonds or walnuts for extra texture.
🔥 Spicy Kick: A pinch of cayenne or cinnamon enhances the flavor.
🌱 Vegan Version: Use dairy-free alternatives for a plant-based treat.
☕ Flavor Boost: A dash of espresso powder intensifies the chocolate taste.
FAQs
To ensure your butterfinger balls recipe turns out perfectly every time, here are some frequently asked questions along with practical answers:
Can I freeze these choco treats?
Absolutely! Place your fully coated butterfinger balls in an airtight container and freeze for up to 2 months. When you’re ready to enjoy them, let them thaw in the refrigerator for a few hours. This method helps preserve both the texture and flavor.
How long do they last in the fridge?
Stored in an airtight container, these treats can last for up to one week in the refrigerator. They remain fresh and delicious when kept chilled, making them a great option for preparing in advance.
Can I make this recipe dairy-free or vegan?
Yes, you can! Simply substitute the cream cheese and butter with dairy-free alternatives and choose vegan chocolate chips. This way, your butterfinger balls recipe remains inclusive without sacrificing flavor or texture.
What should I do if my dough is too sticky?
If you find the mixture too sticky to roll, gradually add more powdered sugar until you achieve a firm yet pliable dough. This small adjustment ensures that your balls are easy to form and coat evenly.
Can I use a different candy instead of Butterfinger?
Certainly! Feel free to experiment with your favorite crunchy candy bars or treats. The key is to maintain a balance between the creamy base and the candy pieces, so any similar candy can work beautifully in this recipe.
By addressing these common questions, you can confidently navigate any challenges and customize the butterfinger balls recipe to suit your taste and dietary needs. Enjoy exploring these answers and have fun perfecting your dessert!